Printer Head Cleaning
Run a nozzle check before you clean, then run one cleaning at a time and check again. Stop at the limit in your manual and leave the printer off for several hours. Repeated cycles mostly waste ink. The advisor below counts for you and shows the limit from your printer maker’s manuals.
By Online Printer Test PageLast updated
Cleaning-cycle advisor
Count each head cleaning you run for this problem. The advice changes as the count goes up. Your count stays on this device only.
Check before you clean
Print a nozzle check first. Only clean if it shows gaps. Cleaning a head that is already fine just uses ink.
What Epson’s manuals say
- EcoTank (ET-2800/ET-2803): if quality does not improve after cleaning the print head up to 3 times, turn the product off and wait at least 12 hours. Then run a nozzle check and clean again. If it still does not improve, run a Power Cleaning. The same 3 times / 12 hours rule appears in the ET-2400, ET-2720, ET-2760, ET-2850, ET-3850, ET-4800 and L3210 (Epson America) guides.Source on files.support.epson.com, checked Oct 12, 2026
- Reading the nozzle check (ET-2800): no gaps in the lines means the print head is clean. Gaps or a faint pattern means it needs cleaning. All or most lines missing means it needs a Power Cleaning.Source on files.support.epson.com, checked Oct 12, 2026
- Power Cleaning (EcoTank ET-2800): use it only if needed because it consumes a lot of ink. Each ink tank must be at least one-third full or the product may be damaged. If there is no improvement, turn off and wait at least 12 hours before another Power Cleaning. It can make the ink pads reach capacity sooner, and at end of pad life the printer stops and needs Epson service.Source on files.support.epson.com, checked Oct 12, 2026
- ET-2800 control-panel Power Cleaning: wait at least 12 hours between Power Cleanings. If quality still does not improve after several Power Cleanings, contact Epson support.Source on files.support.epson.com, checked Oct 12, 2026
What Canon’s manuals say
- PIXMA TS3500: print nozzle check, clean, re-check; if not resolved after doing steps 1-3 twice, deep clean; if still not resolved, turn off the power and deep clean again after 24 hours; then replace the FINE cartridge; then contact a Canon service center.Source on ij.manual.canon, checked Oct 12, 2026
- PIXMA TS3500 troubleshooting: clean, clean again, deep clean; if no improvement turn off the printer for more than 24 hours without disconnecting the power plug, then deep clean again. If not resolved after deep cleaning twice, the print head may be damaged or out of ink - replace the FINE cartridge.Source on ij.manual.canon, checked Oct 12, 2026
- Only clean when the nozzle check shows missing lines or horizontal white streaks, because cleaning consumes ink; if the problem persists after cleaning twice, perform deep cleaning.Source on ij.manual.canon, checked Oct 12, 2026
- MegaTank G3060 series: repeat nozzle check + cleaning twice, then deep clean; if not resolved turn off the power and deep clean again after 24 hours; if still not resolved perform Ink Flush, which consumes a great amount of ink (takes about 5 to 6 minutes).Source on ij.manual.canon, checked Oct 12, 2026
What Brother’s manuals say
- Current Brother inkjet guides (MFC-J1010DW/J1170DW): if quality has not improved, repeat cleaning; if it still does not improve after repeating several times, contact Brother Customer Service. Cleaning consumes ink and cleaning too often wastes ink. No exact number is given.Source on support.brother.com, checked Oct 12, 2026
- MFC-J4335DW/J4535DW and MFC-J5855DW/J5955DW: if several cleanings do not help, use the Special cleaning method, which uses the most cleaning power and the most ink; use it only after several normal cleanings failed. No exact number is given.Source on support.brother.com, checked Oct 12, 2026
- MFC-J995DW/J805DW/J815DW (INKvestment Tank): if cleaning does not improve print, install a new genuine cartridge for each problem colour, clean again, and contact Brother Customer Service if still not improved.Source on support.brother.com, checked Oct 12, 2026
- MFC-T4500DW (ink tank) FAQ: if you clean the print head at least five (5) times and print has not improved, clean up to three (3) more times; if still not improved, contact Brother Customer Service.Source on support.brother.com, checked Oct 12, 2026
What HP’s manuals say
We have not found a cleaning limit in HP’s manuals yet. Follow the steps for your model on the HP page and stop if two cleanings in a row make no difference.
Printed? How did it look?
- Scale: 100% or Actual size, not Fit to page
- Headers and footers: off
- Paper in the tray matches US Letter
What to look for: purge sheet: all colors
- Compare the columns. Any column with white lines or patches needs another look after resting the printer.
- This sheet uses a lot of ink. Print one, then run a nozzle check.
What to look for: purge sheet: cyan
- The last band should look more even than the first.
- If white lines remain in every band, rest the printer and run a nozzle check before cleaning again.
What to look for: purge sheet: magenta
- The last band should look more even than the first.
- If white lines remain in every band, rest the printer and run a nozzle check before cleaning again.
What to look for: purge sheet: yellow
- The last band should look more even than the first.
- If white lines remain in every band, rest the printer and run a nozzle check before cleaning again.
What to look for: purge sheet: black
- The last band should look more even than the first.
- If white lines remain in every band, rest the printer and run a nozzle check before cleaning again.
What to look for: nozzle check grid
- Every step of each staircase should be complete. A missing step or broken line points to that ink.
- Thin white lines across a solid block are the classic clogged-nozzle sign.
- For a nozzle-by-nozzle reading, also run your printer’s own nozzle check.
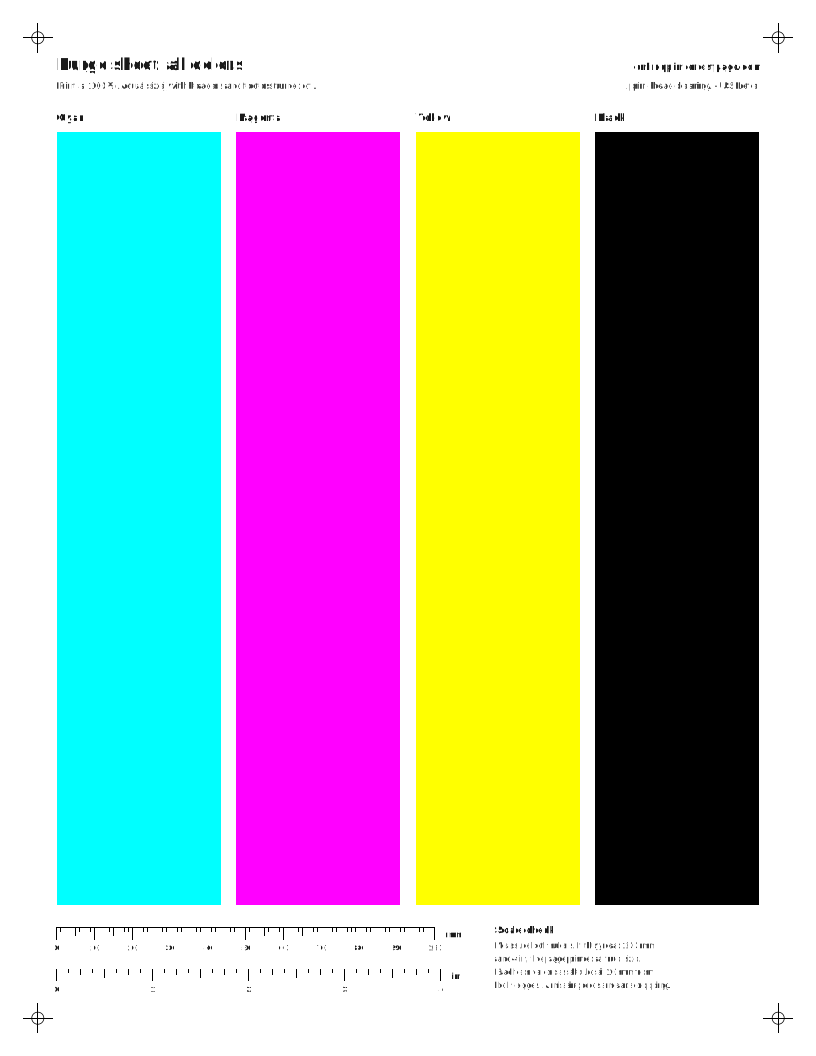
Purge sheets use a lot of ink
Print one sheet for the color that shows gaps, then run a nozzle check. Do not print purge sheets back to back. If gaps remain, rest the printer instead.
Ink-saver maintenance strip
One sheet holds 20 small cells. Each week, put the same sheet back in the tray and print the next cell. Every ink fires a little, which helps keep nozzles from drying, and a whole sheet lasts about five months.
Next: cell 1 of 20
Cell 1 also prints the grid and the scale rulers. Later cells print only their own patch, so nothing overlaps. Check your manual for which way up to reload a printed sheet.
Weekly reminder
Download a calendar event that repeats every week. Works with Google Calendar, Apple Calendar and Outlook. No account needed.
Print it automatically every week
Prefer it to happen on its own? These commands save the low-ink ink-saver sheet and print it every Saturday at 10:00 on your default printer. They run on your computer only. Your computer and printer need to be on at that time. For A4, change -letter.pdf to -a4.pdf.
Mac and Linux
Download the sheet and print it once to test
mkdir -p ~/printer-keepalive
curl -L -o ~/printer-keepalive/ink-saver.pdf https://onlineprintertestpage.com/pdf/ink-saver-color-letter.pdf
lp ~/printer-keepalive/ink-saver.pdf
Run crontab -e and add this line (Saturdays at 10:00)
0 10 * * 6 /usr/bin/lp "$HOME/printer-keepalive/ink-saver.pdf"Sources: CUPS: printing with lp, crontab(5) manual.
Windows
In PowerShell: download the sheet and print it once to test
$f = "$env:USERPROFILE\printer-keepalive\ink-saver.pdf"
New-Item -ItemType Directory -Force (Split-Path $f) | Out-Null
Invoke-WebRequest https://onlineprintertestpage.com/pdf/ink-saver-color-letter.pdf -OutFile $f
Start-Process -FilePath $f -Verb Print
In the same window: schedule it for Saturdays at 10:00
schtasks /create /tn "Printer keep-alive" /sc weekly /d SAT /st 10:00 /tr "powershell -NoProfile -Command Start-Process -FilePath '$f' -Verb Print"The print command uses your default PDF app. If the test print does nothing, that app does not support printing from the command line; set a different PDF reader as the default, or use the calendar reminder instead.
Sources: Microsoft: Start-Process -Verb Print, Microsoft: schtasks create.
Head cleaning steps by model
Steps are summarized from each maker’s own manuals and support pages, with a link to the source and the date we last checked it. If your model is missing, the closest family usually uses the same menus, but confirm in your manual.
51 model families
Epson EcoTank ET-2400 (no LCD, button-only)ET-2400, EcoTank ET-2400Inkjet
Cleaning
- Product buttons: make sure no product lights show an error and load a few sheets of plain paper.
- Hold down the stop button for 5 seconds to start the cleaning cycle. The power light flashes during the cycle and stays on when it finishes.
- Never turn the printer off or open the front cover during a cleaning cycle.
- Run a nozzle check to confirm the head is clean.
- Computer utility: load a few sheets of plain paper, open the utility (Windows: right-click the product icon in the right side of the taskbar (click the up arrow first if it is hidden). Mac: Apple menu or Dock > System Preferences > Print & Fax, Print & Scan, or Printers & Scanners > select the product > Options & Supplies > Utility > Open Printer Utility.)
- Select Head Cleaning or Print Head Cleaning and click Start. Do not turn the product off during the cycle.
- When the cycle finishes, click Print Nozzle Check Pattern, then Print.
- No gaps: click Finish. Gaps or faint: click Clean to clean again.
- Almost the entire pattern missing: click Finish and run a Power Cleaning.
- Power Cleaning (computer utility only): make sure each ink tank is at least one-third full, open the utility (Windows: right-click the product icon in the taskbar, select Printer Settings, and click the Maintenance tab. Mac: Open Printer Utility as above), select Power Cleaning and follow the on-screen instructions, then run a nozzle check.
Source: ET-2400 User's Guide (CPD-62154), pp.139-146 'Print Head Cleaning' and 'Power Cleaning Using a Computer Utility' (files.support.epson.com). Last checked .
Nozzle check
- Product buttons: press the power button to turn the printer off.
- Load a few sheets of plain paper.
- Hold down the stop button and press the power button to turn the printer on. Release both buttons once it turns on.
- The nozzle check pattern prints. It can take a few seconds; if nothing prints, check that paper is loaded.
- No gaps: the head is clean. Gaps or a faint pattern: clean the print head. Almost the entire pattern missing: run a Power Cleaning.
- Computer utility: load a few sheets of plain paper.
- Open the utility. Windows: right-click the product icon in the right side of the taskbar (click the up arrow first if it is hidden). Mac: Apple menu or Dock > System Preferences > Print & Fax, Print & Scan, or Printers & Scanners > select the product > Options & Supplies > Utility > Open Printer Utility.
- Select Nozzle Check or Print Head Nozzle Check and click Print.
- No gaps: click Finish. Gaps or a faint pattern: clean the print head.
- Almost the entire pattern missing: click Finish and run a Power Cleaning.
Source: ET-2400 User's Guide (CPD-62154), pp.134-139 'Checking the Nozzles Using the Product Buttons' / 'Using a Computer Utility' (files.support.epson.com). Last checked .
Note: The ET-2400 guide gives no control-panel alignment; alignment is done from the computer utility. Cleaning limits: up to 3 cleanings, then turn off and wait at least 12 hours.
Epson EcoTank ET-2720 (small LCD)ET-2720, EcoTank ET-2720Inkjet
Cleaning
- Control panel: make sure the LCD shows no errors and the output tray is extended, and load a few sheets of plain paper.
- Press the home button if necessary, select Maintenance and press OK, then select Head Cleaning and press OK.
- Press the start button. The power light flashes during the cycle; never open the inner cover or turn the printer off while it runs.
- Select Nozzle Check, press OK, then press start to confirm the head is clean.
- Computer utility: load a few sheets of plain paper, open the utility (Windows: right-click the product icon in the right side of the taskbar (click the up arrow first if it is hidden). Mac: Apple menu or Dock > System Preferences > Print & Fax, Print & Scan, or Printers & Scanners > select the product > Options & Supplies > Utility > Open Printer Utility.)
- Select Head Cleaning and click Start. Do not turn the product off during the cycle.
- When the cycle finishes, click Print Nozzle Check Pattern, then Print.
- No gaps: click Finish. Gaps or faint: click Clean to clean again.
- Power Cleaning from the control panel: turn the printer off, check that each ink tank is at least one-third full, then hold the power button and the help button together until the Power Cleaning screen appears. Follow the LCD instructions, then run a nozzle check.
- Power Cleaning from a computer: open the utility (Windows: right-click the product icon in the taskbar, select Printer Settings, and click the Maintenance tab.), select Power Cleaning, and follow the on-screen instructions.
Source: ET-2720 User's Guide (CPD-56719), pp.144-151 'Print Head Cleaning' and 'Power Cleaning' (files.support.epson.com). Last checked .
Nozzle check
- Control panel: make sure the LCD shows no errors and the output tray is extended.
- Load a few sheets of plain paper.
- Press the home button, if necessary, select Maintenance and press OK.
- Press OK again to select Nozzle Check, then press the start button to print.
- No gaps: select No and press OK. Gaps or a faint pattern: select Yes, press OK, and follow the on-screen cleaning instructions.
- Computer utility: load a few sheets of plain paper.
- Open the utility. Windows: right-click the product icon in the right side of the taskbar (click the up arrow first if it is hidden). Mac: Apple menu or Dock > System Preferences > Print & Fax, Print & Scan, or Printers & Scanners > select the product > Options & Supplies > Utility > Open Printer Utility.
- Select Nozzle Check and click Print.
- No gaps: click Finish. Gaps or a faint pattern: clean the print head.
Source: ET-2720 User's Guide (CPD-56719), pp.139-143 'Checking the Nozzles Using the Product Control Panel' / 'Using a Computer Utility' (files.support.epson.com). Last checked .
Note: Power Cleaning on the ET-2720 uses a power + help button combination with the printer off. Wait at least 12 hours between Power Cleanings.
Epson EcoTank ET-2760 (small LCD)ET-2760, EcoTank ET-2760Inkjet
Cleaning
- Control panel: make sure the LCD shows no errors and the output tray is extended, and load a few sheets of plain paper.
- Press the home button if necessary, select Maintenance and press OK, then select Head Cleaning and press OK.
- Press the start button to clean the head. Never turn the printer off during the cycle.
- Select Nozzle Check, press OK, then press start to confirm the head is clean.
- Computer utility: load a few sheets of plain paper, open the utility (Windows: right-click the product icon in the right side of the taskbar (click the up arrow first if it is hidden). Mac: Apple menu or Dock > System Preferences > Print & Fax, Print & Scan, or Printers & Scanners > select the product > Options & Supplies > Utility > Open Printer Utility.)
- Select Head Cleaning and click Start. Do not turn the product off during the cycle.
- When the cycle finishes, click Print Nozzle Check Pattern, then Print.
- No gaps: click Finish. Gaps or faint: click Clean to clean again.
- Power Cleaning from the control panel: turn the printer off, check that each ink tank is at least one-third full, then hold the power button and the help button together until the Power Cleaning screen appears. Follow the LCD instructions, then run a nozzle check.
- Power Cleaning from a computer: open the utility (Windows: right-click the product icon in the taskbar, select Printer Settings, and click the Maintenance tab.), select Power Cleaning, and follow the on-screen instructions.
Source: ET-2760 User's Guide (CPD-57083), pp.156-162 'Print Head Cleaning' and 'Power Cleaning' (files.support.epson.com). Last checked .
Nozzle check
- Control panel: make sure the LCD shows no errors and the output tray is extended.
- Load a few sheets of plain paper.
- Press the home button if necessary, select Maintenance and press OK.
- Press OK to select Nozzle Check, then press the start button to print.
- No gaps: select No and press OK. Gaps or a faint pattern: select Yes, press OK, and follow the on-screen cleaning instructions.
- Computer utility: load a few sheets of plain paper.
- Open the utility. Windows: right-click the product icon in the right side of the taskbar (click the up arrow first if it is hidden). Mac: Apple menu or Dock > System Preferences > Print & Fax, Print & Scan, or Printers & Scanners > select the product > Options & Supplies > Utility > Open Printer Utility.
- Select Nozzle Check and click Print.
- No gaps: click Finish. Gaps or a faint pattern: clean the print head.
Source: ET-2760 User's Guide (CPD-57083), pp.152-155 'Checking the Nozzles Using the Product Control Panel' / 'Using a Computer Utility' (files.support.epson.com). Last checked .
Epson EcoTank ET-2800 series (ET-2800/ET-2803, small LCD)ET-2800, ET-2803, EcoTank ET-2800, EcoTank ET-2803Inkjet
Cleaning
- Control panel: make sure the LCD shows no errors and the output tray is extended, and load a few sheets of plain paper.
- Press the home button if necessary, select Maintenance and press OK, then select Head Cleaning and press OK.
- Press the start button. The power light flashes during the cycle; never open the inner cover or turn the printer off while it runs.
- Select Nozzle Check, press OK, then press start to check the result. No gaps: select No and press OK. Gaps or faint: select Yes and press OK. All or most lines missing: select No and run a Power Cleaning.
- Computer utility: load a few sheets of plain paper, open the utility (Windows: right-click the product icon in the right side of the taskbar (click the up arrow first if it is hidden). Mac: Apple menu or Dock > System Preferences or System Settings > Print & Fax, Print & Scan, or Printers & Scanners > select the product > Options & Supplies > Utility > Open Printer Utility.)
- Select Head Cleaning or Print Head Cleaning and click Start. Do not turn the product off during the cycle.
- When the cycle finishes, click Print Nozzle Check Pattern, then Print.
- No gaps: click Finish. Gaps or faint: click Clean to clean again.
- Almost the entire pattern missing: click Finish and run a Power Cleaning.
- Power Cleaning from the control panel: check that each ink tank is at least one-third full, load plain paper, press home if necessary, select Maintenance and press OK, select Power Cleaning and press OK, follow the LCD instructions, then run a nozzle check.
- Power Cleaning from a computer: open the utility (Windows: right-click the product icon in the taskbar, select Printer Settings, and click the Maintenance tab.), select Power Cleaning, and follow the on-screen instructions.
Source: ET-2800/ET-2803 User's Guide (CPD-60271), pp.164-174 'Print Head Cleaning' and 'Power Cleaning' (files.support.epson.com). Last checked .
Nozzle check
- Control panel: make sure the LCD shows no errors and the output tray is extended.
- Load a few sheets of plain paper.
- Press the home button if necessary, select Maintenance and press OK.
- Press OK again to select Nozzle Check, then press the start button to print.
- No gaps: select No and press OK. Gaps or a faint pattern: select Yes, press OK, and follow the on-screen cleaning instructions. All or most lines missing: select No and run a Power Cleaning.
- Computer utility: load a few sheets of plain paper.
- Open the utility. Windows: right-click the product icon in the right side of the taskbar (click the up arrow first if it is hidden). Mac: Apple menu or Dock > System Preferences or System Settings > Print & Fax, Print & Scan, or Printers & Scanners > select the product > Options & Supplies > Utility > Open Printer Utility.
- Select Nozzle Check or Print Head Nozzle Check and click Print.
- No gaps: click Finish. Gaps or a faint pattern: clean the print head.
- Almost the entire pattern missing: click Finish and run a Power Cleaning.
Source: ET-2800/ET-2803 User's Guide (CPD-60271), pp.159-162 'Checking the Nozzles Using the Product Control Panel' / 'Using a Computer Utility' (files.support.epson.com). Last checked .
Note: Same steps also published as single HTML pages in the online guide (see generalSources). The guide documents no power-on button combination for the nozzle check on this model; use the Maintenance menu.
Epson EcoTank ET-2850 (LCD)ET-2850, EcoTank ET-2850Inkjet
Cleaning
- Control panel: make sure the LCD shows no errors and the output tray is extended, and load a few sheets of plain paper.
- Press the home button if necessary and select Maintenance > Head Cleaning.
- Press the start button. When the cycle finishes a nozzle pattern prints automatically. Never turn the printer off or open the scanner unit during the cycle.
- No gaps: select No and press OK. Gaps or faint: select Yes and press OK. Almost the entire pattern missing: select No, press OK, then run a Power Cleaning.
- Computer utility: load a few sheets of plain paper, open the utility (Windows: right-click the product icon in the right side of the taskbar (click the up arrow first if it is hidden). Mac: Apple menu or Dock > System Preferences > Print & Fax, Print & Scan, or Printers & Scanners > select the product > Options & Supplies > Utility > Open Printer Utility.)
- Select Print Head Cleaning and click Start. Do not turn the product off during the cycle.
- When the cycle finishes, click Print Nozzle Check Pattern, then Print.
- No gaps: click Finish. Gaps or faint: click Clean to clean again.
- Almost the entire pattern missing: click Finish and run a Power Cleaning.
- Power Cleaning from the control panel: check that each ink tank is at least one-third full, press home if necessary, select Maintenance > Power Cleaning, follow the LCD instructions, then run a nozzle check.
- Power Cleaning from a computer: open the utility (Windows: right-click the product icon in the taskbar, select Printer Settings, and click the Maintenance tab.), select Power Cleaning, and follow the on-screen instructions.
Source: ET-2850 User's Guide (CPD-60206), pp.166-174 'Print Head Cleaning' and 'Power Cleaning' (files.support.epson.com). Last checked .
Nozzle check
- Control panel: make sure the LCD shows no errors and the output tray is extended.
- Load a few sheets of plain paper.
- Press the home button if necessary and select Maintenance > Nozzle Check.
- Press the start button to print the pattern.
- No gaps: select No and press OK. Gaps or a faint pattern: select Yes, press OK, and follow the on-screen instructions. Most lines missing: select No, press OK, then run a Power Cleaning.
- Computer utility: load a few sheets of plain paper.
- Open the utility. Windows: right-click the product icon in the right side of the taskbar (click the up arrow first if it is hidden). Mac: Apple menu or Dock > System Preferences > Print & Fax, Print & Scan, or Printers & Scanners > select the product > Options & Supplies > Utility > Open Printer Utility.
- Select Print Head Nozzle Check and click Print.
- No gaps: click Finish. Gaps or a faint pattern: clean the print head.
- Almost the entire pattern missing: click Finish and run a Power Cleaning.
Source: ET-2850 User's Guide (CPD-60206), pp.162-165 'Checking the Nozzles Using the Product Control Panel' / 'Using a Computer Utility' (files.support.epson.com). Last checked .
Epson EcoTank ET-3850 (LCD)ET-3850, EcoTank ET-3850Inkjet
Cleaning
- Control panel: make sure the LCD shows no errors and the output tray is extended, and load a few sheets of plain paper.
- Press the home button if necessary and select Maintenance > Print Head Cleaning.
- Press OK to start. When the cycle finishes a nozzle pattern prints. Never turn the printer off or open the scanner unit during the cycle.
- No gaps: select O. Gaps or faint: select X and follow the on-screen instructions. Almost the entire pattern missing: select O and run a Power Cleaning.
- Computer utility: load a few sheets of plain paper, open the utility (Windows: right-click the product icon in the right side of the taskbar (click the up arrow first if it is hidden). Mac: Apple menu or Dock > System Preferences > Print & Fax, Print & Scan, or Printers & Scanners > select the product > Options & Supplies > Utility > Open Printer Utility.)
- Select Print Head Cleaning and click Start. Do not turn the product off during the cycle.
- When the cycle finishes, click Print Nozzle Check Pattern, then Print.
- No gaps: click Finish. Gaps or faint: click Clean to clean again.
- Almost the entire pattern missing: click Finish and run a Power Cleaning.
- Power Cleaning from the control panel: check that each ink tank is at least one-third full, press home if necessary, select Maintenance > Power Cleaning, follow the on-screen instructions, select OK on the confirmation screen, then run a nozzle check.
- Power Cleaning from a computer: open the utility (Windows: right-click the product icon in the taskbar, select Printer Settings, and click the Maintenance tab.), select Power Cleaning, and follow the on-screen instructions.
Source: ET-3850 User's Guide (CPD-60203), pp.187-195 'Print Head Cleaning' and 'Power Cleaning' (files.support.epson.com). Last checked .
Nozzle check
- Control panel: make sure the LCD shows no errors and the output tray is extended.
- Load a few sheets of plain paper.
- Press the home button if necessary and select Maintenance > Print Head Nozzle Check.
- Select Print.
- No gaps: select O. Gaps or a faint pattern: select X and follow the on-screen cleaning instructions. Almost the entire pattern missing: select O and run a Power Cleaning.
- Computer utility: load a few sheets of plain paper.
- Open the utility. Windows: right-click the product icon in the right side of the taskbar (click the up arrow first if it is hidden). Mac: Apple menu or Dock > System Preferences > Print & Fax, Print & Scan, or Printers & Scanners > select the product > Options & Supplies > Utility > Open Printer Utility.
- Select Print Head Nozzle Check and click Print.
- No gaps: click Finish. Gaps or a faint pattern: clean the print head.
- Almost the entire pattern missing: click Finish and run a Power Cleaning.
Source: ET-3850 User's Guide (CPD-60203), pp.182-186 'Checking the Nozzles Using the Product Control Panel' / 'Using a Computer Utility' (files.support.epson.com). Last checked .
Note: Uses a maintenance box: Power Cleaning can fill it sooner and cannot run if ink or free maintenance-box space is too low.
Epson EcoTank ET-4800 (LCD)ET-4800, EcoTank ET-4800Inkjet
Cleaning
- Control panel: make sure the LCD shows no errors and the output tray is extended, and load a few sheets of plain paper.
- Press the home button if necessary, select Maintenance and press OK, then select Head Cleaning and press OK.
- Press the start button. Never open the inner cover or turn the printer off during the cycle.
- Select Nozzle Check, press OK, then press start to check the result. No gaps: select No. Gaps or faint: select Yes. All or most lines missing: select No and run a Power Cleaning.
- Computer utility: load a few sheets of plain paper, open the utility (Windows: right-click the product icon in the right side of the taskbar (click the up arrow first if it is hidden). Mac: Apple menu or Dock > System Preferences or System Settings > Print & Fax, Print & Scan, or Printers & Scanners > select the product > Options & Supplies > Utility > Open Printer Utility.)
- Select Head Cleaning or Print Head Cleaning and click Start. Do not turn the product off during the cycle.
- When the cycle finishes, click Print Nozzle Check Pattern, then Print.
- No gaps: click Finish. Gaps or faint: click Clean to clean again.
- Almost the entire pattern missing: click Finish and run a Power Cleaning.
- Power Cleaning from the control panel: check that each ink tank is at least one-third full, load plain paper, press home if necessary, select Maintenance and press OK, select Power Cleaning and press OK, follow the LCD instructions, then run a nozzle check.
- Power Cleaning from a computer: open the utility (Windows: right-click the product icon in the taskbar, select Printer Settings, and click the Maintenance tab.), select Power Cleaning, and follow the on-screen instructions.
Source: ET-4800 User's Guide (CPD-60267), pp.215-225 'Print Head Cleaning' and 'Power Cleaning' (files.support.epson.com). Last checked .
Nozzle check
- Control panel: make sure the LCD shows no errors and the output tray is extended.
- Load a few sheets of plain paper.
- Press the home button if necessary, select Maintenance and press OK.
- Press OK again to select Nozzle Check, then press the start button to print.
- No gaps: select No and press OK. Gaps or a faint pattern: select Yes, press OK, and follow the on-screen cleaning instructions. All or most lines missing: select No and run a Power Cleaning.
- Computer utility: load a few sheets of plain paper.
- Open the utility. Windows: right-click the product icon in the right side of the taskbar (click the up arrow first if it is hidden). Mac: Apple menu or Dock > System Preferences or System Settings > Print & Fax, Print & Scan, or Printers & Scanners > select the product > Options & Supplies > Utility > Open Printer Utility.
- Select Nozzle Check or Print Head Nozzle Check and click Print.
- No gaps: click Finish. Gaps or a faint pattern: clean the print head.
- Almost the entire pattern missing: click Finish and run a Power Cleaning.
Source: ET-4800 User's Guide (CPD-60267), pp.210-214 'Checking the Nozzles Using the Product Control Panel' / 'Using a Computer Utility' (files.support.epson.com). Last checked .
Epson EcoTank Photo ET-8500 / ET-8550 (touchscreen)ET-8500, ET-8550, EcoTank Photo ET-8500, EcoTank Photo ET-8550Inkjet
Cleaning
- Control panel: make sure the LCD shows no errors and the CD/DVD tray is not inserted, and load plain paper in Cassette 2 (lower).
- Select the home icon if necessary, then Maintenance > Print Head Cleaning.
- Select Start. When the cycle finishes a nozzle pattern prints. Never turn the printer off or open the scanner unit during the cycle.
- No gaps: select O. Gaps or faint: select X and follow the on-screen instructions.
- Computer utility: load a few sheets of plain paper, open the utility (Windows: right-click the product icon in the right side of the taskbar (click the up arrow first if it is hidden). Mac: Apple menu or Dock > System Preferences > Print & Fax, Print & Scan, or Printers & Scanners > select the product > Options & Supplies > Utility > Open Printer Utility.)
- Select Print Head Cleaning and click Start. Do not turn the product off during the cycle.
- When the cycle finishes, click Print Nozzle Check Pattern, then Print.
- No gaps: click Finish. Gaps or faint: click Clean to clean again.
- Power Cleaning (control panel): check that each ink tank is at least one-third full, load plain paper in Cassette 2, select Maintenance > Power Cleaning, and follow the on-screen instructions. A nozzle check pattern prints at the end.
Source: ET-8500/ET-8550 User's Guide (CPD-59879), pp.236-243 'Print Head Cleaning' and 'Power Cleaning Using the Product Control Panel' (files.support.epson.com). Last checked .
Nozzle check
- Control panel: make sure the LCD shows no errors and the CD/DVD tray is not inserted.
- Load a few sheets of plain paper in Cassette 2 (lower).
- Select the home icon if necessary, then Maintenance > Print Head Nozzle Check.
- Select Print.
- No gaps: select O. Gaps or a faint pattern: select X and follow the on-screen instructions to clean, re-check, and repeat if needed.
- Computer utility: load plain paper in Cassette 2 (lower) and open the utility (Windows: right-click the product icon in the right side of the taskbar (click the up arrow first if it is hidden). Mac: Apple menu or Dock > System Preferences > Print & Fax, Print & Scan, or Printers & Scanners > select the product > Options & Supplies > Utility > Open Printer Utility.)
- Select Print Head Nozzle Check and click Print. No gaps: click Finish. Gaps or faint: clean the print head.
Source: ET-8500/ET-8550 User's Guide (CPD-59879), pp.232-235 'Checking the Nozzles Using the Product Control Panel' / 'Using a Computer Utility' (files.support.epson.com). Last checked .
Note: Uses a maintenance box. After a Power Cleaning, turn the printer off and wait at least 12 hours before printing another nozzle check or running another cleaning.
Epson Expression Home XP-4100 / XP-4105 (cartridge, LCD)XP-4100, XP-4105, Expression Home XP-4100Inkjet
Cleaning
- Control panel: load a few sheets of plain paper.
- Press the home button if necessary, then select Maintenance > Print Head Cleaning.
- Select Start. Never turn the printer off or open the scanner unit during the cycle.
- When the finished message appears, select Check, then Print, to print a nozzle check pattern.
- Computer utility: load a few sheets of plain paper, open the utility (Windows: right-click the product icon in the right side of the taskbar (click the up arrow first if it is hidden). Mac: Apple menu or Dock > System Preferences > Print & Fax, Print & Scan, or Printers & Scanners > select the product > Options & Supplies > Utility > Open Printer Utility.)
- Select Head Cleaning and click Start. Do not turn the product off during the cycle.
- When the cycle finishes, click Print Nozzle Check Pattern, then Print.
- No gaps: click Finish. Gaps or faint: click Clean to clean again.
Source: XP-4100/XP-4105 User's Guide (CPD-56917), pp.181-184 'Cleaning the Print Head Using the Product Control Panel' / 'Using a Computer Utility' (files.support.epson.com). Last checked .
Nozzle check
- Control panel: load a few sheets of plain paper.
- Press the home button if necessary, then select Maintenance > Print Head Nozzle Check.
- Select Print.
- No gaps: select O. Gaps or a faint pattern: select X and follow the on-screen instructions to clean, re-check, and repeat as needed.
- Computer utility: load a few sheets of plain paper.
- Open the utility. Windows: right-click the product icon in the right side of the taskbar (click the up arrow first if it is hidden). Mac: Apple menu or Dock > System Preferences > Print & Fax, Print & Scan, or Printers & Scanners > select the product > Options & Supplies > Utility > Open Printer Utility.
- Select Nozzle Check and click Print.
- No gaps: click Finish. Gaps or a faint pattern: clean the print head.
Source: XP-4100/XP-4105 User's Guide (CPD-56917), pp.175-180 'Checking the Nozzles Using the Product Control Panel' / 'Using a Computer Utility' (files.support.epson.com). Last checked .
Note: Cartridge model, no Power Cleaning in the guide. Epson's limit here is different from EcoTank models: up to 4 cleanings, then wait at least 6 hours without printing.
Epson Expression Premium XP-6100 (cartridge, LCD)XP-6100, Expression Premium XP-6100Inkjet
Cleaning
- Control panel: make sure the LCD shows no errors, the CD/DVD tray is not inserted, and the output tray is extended, and load plain paper.
- Press the home button if necessary, then select Maintenance > Print Head Cleaning.
- Select Start. Never turn the printer off or open the scanner unit during the cycle.
- Select Check, then Print, to print a nozzle check pattern. No gaps: select O. Gaps or faint: select X and follow the on-screen instructions.
- Computer utility: load a few sheets of plain paper, open the utility (Windows: right-click the product icon in the right side of the taskbar (click the up arrow first if it is hidden). Mac: Apple menu or Dock > System Preferences > Print & Fax, Print & Scan, or Printers & Scanners > select the product > Options & Supplies > Utility > Open Printer Utility.)
- Select Head Cleaning and click Start. Do not turn the product off during the cycle.
- When the cycle finishes, click Print Nozzle Check Pattern, then Print.
- No gaps: click Finish. Gaps or faint: click Clean to clean again.
Source: XP-6100 User's Guide (CPD-56653), pp.246-250 'Cleaning the Print Head Using the Product Control Panel' / 'Using a Computer Utility' (files.support.epson.com). Last checked .
Nozzle check
- Control panel: make sure the LCD shows no errors, the CD/DVD tray is not inserted, and the output tray is extended.
- Load a few sheets of plain paper.
- Press the home button if necessary, then select Maintenance > Print Head Nozzle Check.
- Select Print.
- No gaps: select O. Gaps or a faint pattern: select X and follow the on-screen instructions to clean, re-check, and repeat if needed.
- Computer utility: load a few sheets of plain paper.
- Open the utility. Windows: right-click the product icon in the right side of the taskbar (click the up arrow first if it is hidden). Mac: Apple menu or Dock > System Preferences > Print & Fax, Print & Scan, or Printers & Scanners > select the product > Options & Supplies > Utility > Open Printer Utility.
- Select Nozzle Check and click Print.
- No gaps: click Finish. Gaps or a faint pattern: clean the print head.
Source: XP-6100 User's Guide (CPD-56653), pp.241-245 'Checking the Nozzles Using the Product Control Panel' / 'Using a Computer Utility' (files.support.epson.com). Last checked .
Note: Cartridge model, no Power Cleaning in the guide. Limit: up to 3 cleanings, then wait at least 6 hours without printing.
Epson WorkForce WF-2850 (cartridge, LCD)WF-2850, WorkForce WF-2850Inkjet
Cleaning
- Control panel: make sure the LCD shows no errors and load a few sheets of plain paper.
- Press the home button if necessary, then select Maintenance > Print Head Cleaning.
- Select Start. Never turn the printer off or open the front cover during the cycle.
- Select Check, then Print, to confirm the head is clean, and follow the on-screen instructions to repeat if needed.
- Computer utility: load a few sheets of plain paper, open the utility (Windows: right-click the product icon in the right side of the taskbar (click the up arrow first if it is hidden). Mac: Apple menu or Dock > System Preferences > Print & Fax, Print & Scan, or Printers & Scanners > select the product > Options & Supplies > Utility > Open Printer Utility.)
- Select Head Cleaning and click Start. Do not turn the product off during the cycle.
- When the cycle finishes, click Print Nozzle Check Pattern, then Print.
- No gaps: click Finish. Gaps or faint: click Clean to clean again.
Source: WF-2850 User's Guide (CPD-56932), pp.215-217 'Cleaning the Print Head Using the Product Control Panel' / 'Using a Computer Utility' (files.support.epson.com). Last checked .
Nozzle check
- Control panel: make sure the LCD shows no errors and load a few sheets of plain paper.
- Press the home button if necessary, then select Maintenance > Print Head Nozzle Check.
- Select Print.
- No gaps: select O. Gaps or a faint pattern: select X and follow the on-screen instructions to clean, re-check, and repeat as needed.
- Computer utility: load a few sheets of plain paper.
- Open the utility. Windows: right-click the product icon in the right side of the taskbar (click the up arrow first if it is hidden). Mac: Apple menu or Dock > System Preferences > Print & Fax, Print & Scan, or Printers & Scanners > select the product > Options & Supplies > Utility > Open Printer Utility.
- Select Nozzle Check and click Print.
- No gaps: click Finish. Gaps or a faint pattern: clean the print head.
Source: WF-2850 User's Guide (CPD-56932), pp.211-214 'Checking the Nozzles Using the Product Control Panel' / 'Using a Computer Utility' (files.support.epson.com). Last checked .
Note: Cartridge model. Limit: up to 4 cleanings, then wait at least 6 hours without printing. If still poor, a cartridge may be old or damaged.
Epson WorkForce Pro WF-3820 series (cartridge, touchscreen)WF-3820, WorkForce Pro WF-3820, WF-3820DWFInkjet
Cleaning
- Control panel: make sure the LCD shows no errors and load a few sheets of plain paper.
- Press the home button if necessary, then select Maintenance > Print Head Cleaning.
- Select Start. Never turn the printer off or open the front cover during the cycle.
- Select Check, then Print, to confirm the head is clean.
- Computer utility: load a few sheets of plain paper, open the utility (Windows: right-click the product icon in the right side of the taskbar (click the up arrow first if it is hidden). Mac: Apple menu or Dock > System Preferences > Print & Fax, Print & Scan, or Printers & Scanners > select the product > Options & Supplies > Utility > Open Printer Utility.)
- Select Print Head Cleaning and click Start. Do not turn the product off during the cycle.
- When the cycle finishes, click Print Nozzle Check Pattern, then Print.
- No gaps: click Finish. Gaps or faint: click Clean to clean again.
Source: WF-3820 Series User's Guide (CPD-58812), pp.262-264 'Cleaning the Print Head Using the Product Control Panel' / 'Using a Computer Utility' (files.support.epson.com). Last checked .
Nozzle check
- Control panel: make sure the LCD shows no errors and load a few sheets of plain paper.
- Press the home button if necessary, then select Maintenance > Print Head Nozzle Check.
- Select Start.
- No gaps: select O. Gaps or a faint pattern: select X and follow the on-screen instructions to clean, re-check, and repeat as needed.
- Computer utility: load a few sheets of plain paper.
- Open the utility. Windows: right-click the product icon in the right side of the taskbar (click the up arrow first if it is hidden). Mac: Apple menu or Dock > System Preferences > Print & Fax, Print & Scan, or Printers & Scanners > select the product > Options & Supplies > Utility > Open Printer Utility.
- Select Print Head Nozzle Check and click Print.
- No gaps: click Finish. Gaps or a faint pattern: clean the print head.
Source: WF-3820 Series User's Guide (CPD-58812), pp.258-261 'Checking the Nozzles Using the Product Control Panel' / 'Using a Computer Utility' (files.support.epson.com). Last checked .
Note: Also has Settings > Maintenance > Print Quality Adjustment (guide p.267), a guided combined adjustment that prints an alignment sheet. It is not a separate quality report. Limit: up to 4 cleanings, then wait at least 6 hours without printing.
Epson WorkForce Pro WF-4820 / WF-4830 series (cartridge, touchscreen)WF-4830, WF-4820, WorkForce Pro WF-4830, WorkForce Pro WF-4820Inkjet
Cleaning
- Control panel: make sure the LCD shows no errors and load a few sheets of plain paper.
- Press the home button if necessary, then select Maintenance > Print Head Cleaning.
- Select Start. Never turn the printer off or open the front cover during the cycle.
- Select Yes, then Start, to print a nozzle check and confirm the head is clean.
- Computer utility: load a few sheets of plain paper, open the utility (Windows: right-click the product icon in the right side of the taskbar (click the up arrow first if it is hidden). Mac: Apple menu or Dock > System Preferences or System Settings > Print & Fax, Print & Scan, or Printers & Scanners > select the product > Options & Supplies > Utility > Open Printer Utility.)
- Select Head Cleaning or Print Head Cleaning and click Start. Do not turn the product off during the cycle.
- When the cycle finishes, click Print Nozzle Check Pattern, then Print.
- No gaps: click Finish. Gaps or faint: click Clean to clean again.
Source: WF-4820/WF-4830 Series User's Guide (CPD-58814), pp.286-288 'Cleaning the Print Head Using the Product Control Panel' / 'Using a Computer Utility' (files.support.epson.com). Last checked .
Nozzle check
- Control panel: make sure the LCD shows no errors and load a few sheets of plain paper.
- Press the home button if necessary, then select Settings > Maintenance > Print Head Nozzle Check.
- Select Start.
- No gaps: select O. Gaps or a faint pattern: select X and follow the on-screen instructions to clean, re-check, and repeat as needed.
- Computer utility: load a few sheets of plain paper.
- Open the utility. Windows: right-click the product icon in the right side of the taskbar (click the up arrow first if it is hidden). Mac: Apple menu or Dock > System Preferences or System Settings > Print & Fax, Print & Scan, or Printers & Scanners > select the product > Options & Supplies > Utility > Open Printer Utility.
- Select Nozzle Check or Print Head Nozzle Check and click Print.
- No gaps: click Finish. Gaps or a faint pattern: clean the print head.
Source: WF-4820/WF-4830 Series User's Guide (CPD-58814), pp.282-285 'Checking the Nozzles Using the Product Control Panel' / 'Using a Computer Utility' (files.support.epson.com). Last checked .
Note: The guide's nozzle-check path starts at Settings > Maintenance while its cleaning and alignment paths start at Maintenance. Both are recorded as printed. Also has Settings > Maintenance > Print Quality Adjustment (p.291), a combined guided adjustment, not a report. Limit: up to 3 cleanings, then turn off and wait at least 12 hours.
Epson SureColor P700 / P900 (photo, touchscreen)SureColor P700, SureColor P900, SC-P700, SC-P900, P700, P900Inkjet
Cleaning
- Control panel: load plain paper in the rear paper feeder, select the menu icon, then Maintenance > Print Head Nozzle Check and select Start (the guide starts head cleaning from the nozzle-check flow).
- Gaps or faint: select X and follow the on-screen instructions to clean. Never turn the printer off during a cleaning cycle.
- Computer utility: load a few sheets of plain paper, open the utility (Windows: right-click the product icon in the right side of the taskbar (click the up arrow first if it is hidden). Mac: Apple menu or Dock > System Preferences or System Settings > Print & Fax, Print & Scan, or Printers & Scanners > select the product > Options & Supplies > Utility > Open Printer Utility.)
- Select Head Cleaning or Print Head Cleaning and click Start. Do not turn the product off during the cycle.
- When the cycle finishes, click Print Nozzle Check Pattern, then Print.
- No gaps: click Finish. Gaps or faint: click Clean to clean again.
- Power Cleaning (control panel): load plain paper in the rear paper feeder, select the menu icon, then Maintenance > Power Cleaning, and select Start. Print a nozzle check afterwards.
Source: SureColor P700/P900 User's Guide (CPD-58636), pp.131-136 'Print Head Cleaning' and 'Running a Power Cleaning Using the Product Control Panel' (files.support.epson.com). Last checked .
Nozzle check
- Control panel: load a few sheets of plain paper in the rear paper feeder.
- Select the menu icon on the LCD, then Maintenance > Print Head Nozzle Check.
- Select Start.
- No gaps: select O to exit. Gaps or a faint pattern: select X, then Head Cleaning. Almost the entire pattern missing: select X, then Power Cleaning.
- Follow the on-screen instructions to clean, re-check, and repeat as needed.
- Computer utility: load a few sheets of plain paper.
- Open the utility. Windows: right-click the product icon in the right side of the taskbar (click the up arrow first if it is hidden). Mac: Apple menu or Dock > System Preferences or System Settings > Print & Fax, Print & Scan, or Printers & Scanners > select the product > Options & Supplies > Utility > Open Printer Utility.
- Select Nozzle Check or Print Head Nozzle Check and click Print.
- No gaps: click Finish. Gaps or a faint pattern: clean the print head.
- Almost the entire pattern missing: click Finish and run a Power Cleaning.
Source: SureColor P700/P900 User's Guide (CPD-58636), pp.127-130 'Checking the Nozzles Using the Product Control Panel' / 'Using a Computer Utility' (files.support.epson.com). Last checked .
Note: The guide shows the starting LCD icon only as an image, so its name could not be confirmed from the text. Limit: up to 3 cleanings, then turn off with the power button and wait at least 6 hours. After that, run a Power Cleaning.
Epson EcoTank L3210 / L3200 series (no LCD, button-only)L3210, L3200 Series, L3210 Series, EcoTank L3210Inkjet
Cleaning
- Product buttons: make sure no product lights show an error and load a few sheets of plain paper.
- Hold down the stop button for 5 seconds to start the cleaning cycle. The power light flashes during the cycle and stays on when it finishes.
- Never turn the printer off or open the front cover during a cleaning cycle.
- Run a nozzle check to confirm the head is clean.
- Computer utility: load a few sheets of plain paper, open the utility (Windows: right-click the product icon in the right side of the taskbar (click the up arrow first if it is hidden). Mac: Apple menu or Dock > System Preferences > Print & Fax, Print & Scan, or Printers & Scanners > select the product > Options & Supplies > Utility > Open Printer Utility.)
- Select Print Head Cleaning and click Start. Do not turn the product off during the cycle.
- When the cycle finishes, click Print Nozzle Check Pattern, then Print.
- No gaps: click Finish. Gaps or faint: click Clean to clean again.
- Almost the entire pattern missing: click Finish and run a Power Cleaning.
- Power Cleaning (computer utility only): make sure each ink tank is at least one-third full, open the utility (Windows: right-click the product icon in the taskbar, select Printer Settings, and click the Maintenance tab.), select Power Cleaning, and follow the on-screen instructions. Run a nozzle check afterwards.
Source: L3210 User's Guide (CPD-60181, Epson America), pp.119-124 'Print Head Cleaning' and 'Power Cleaning Using a Computer Utility' (files.support.epson.com). Last checked .
Nozzle check
- Product buttons: press the power button to turn the printer off.
- Load a few sheets of plain paper.
- Hold down the stop button and press the power button to turn the printer on. Release both buttons once it turns on.
- The nozzle check pattern prints. It can take a few seconds; if nothing prints, check that paper is loaded.
- No gaps: the head is clean. Gaps or faint: clean the print head. Almost the entire pattern missing: run a Power Cleaning.
- Computer utility: load a few sheets of plain paper.
- Open the utility. Windows: right-click the product icon in the right side of the taskbar (click the up arrow first if it is hidden). Mac: Apple menu or Dock > System Preferences > Print & Fax, Print & Scan, or Printers & Scanners > select the product > Options & Supplies > Utility > Open Printer Utility.
- Select Print Head Nozzle Check and click Print.
- No gaps: click Finish. Gaps or a faint pattern: clean the print head.
- Almost the entire pattern missing: click Finish and run a Power Cleaning.
Source: L3210 User's Guide (CPD-60181, Epson America), pp.114-117 'Checking the Nozzles Using the Product Buttons' / 'Using a Computer Utility' (files.support.epson.com). Last checked .
Note: The international guide (L3210 Series/L3200 Series, NPD6449, download.epson-europe.com) gives the same button combination: turn on while holding the stop button and release when the power light flashes. It also says to hold the stop button for 5 seconds to clean. That guide shows button icons rather than names; the stop identification comes from its button table ('Stops the current operation'). USB-only model, so the guide has no network status sheet.
Epson L805 (ink tank photo, no LCD, button-only)L805, L805 SeriesInkjet
Cleaning
- Product buttons: hold the head-cleaning button (button D in the guide's diagram) for 3 seconds until the power light starts flashing. Head cleaning starts.
- Do not open the printer cover or turn the printer off during cleaning.
- When the power light stops flashing, print another nozzle check pattern. Repeat cleaning and checking until all lines print completely.
- From a computer, run Nozzle Check from the Maintenance tab (Windows) or Epson Printer Utility (Mac) and follow the on-screen instructions.
- Power Ink Flushing (replaces ink in the tubes, uses a lot of ink): Windows: driver Maintenance tab > Power Ink Flushing. Mac: Open Printer Utility > Power Ink Flushing. Then turn the printer off and wait at least 12 hours.
Source: L805 Series User's Guide (NPD5362-00 EN, Epson Europe), pp.50-52 'Checking and Cleaning the Print Head' and 'Replacing Ink inside the Ink Tubes' (download.epson-europe.com). Last checked .
Nozzle check
- Product buttons: load A4 plain paper.
- Press the power button to turn the printer off.
- Turn the printer on while holding down the paper button (the button the guide also uses to load and eject paper). Release the buttons when the power light flashes.
- The nozzle check pattern prints. Broken lines or missing segments (the guide's 'NG' example) mean the nozzles may be clogged. No broken lines (the 'OK' example) means no cleaning is needed.
- Windows: open the printer driver window and click Nozzle Check on the Maintenance tab, then follow the on-screen instructions.
- Mac: System Preferences > Printers & Scanners (or Print & Scan, Print & Fax) > select the printer > Options & Supplies > Utility > Open Printer Utility > Nozzle Check.
Source: L805 Series User's Guide (NPD5362-00 EN, Epson Europe), pp.50-51 'Checking and Cleaning the Print Head' (download.epson-europe.com). Last checked .
Note: The PDF shows buttons as icons. Names here come from the guide's button table: one button loads and ejects paper, and button D is held for more than 3 seconds to run head cleaning. The PDF metadata title is 'L805 Series'.
Epson L1300 / L1800 (A3 ink tank, no LCD, button-only)L1800, L1300Inkjet
Cleaning
- Product buttons: make sure no product lights show an error and load a few sheets of plain paper.
- Hold down the ink button for 3 seconds to start the cleaning cycle. The power light flashes during the cycle and stays on when it finishes. Never turn the printer off during the cycle.
- Run a nozzle check to confirm the head is clean.
- Computer utility: open the utility, select Head Cleaning, click Start, then click Print Nozzle Check Pattern and Print. Click Clean again if there are gaps.
- Ink Tube Flushing (Power Ink Flushing): Windows: taskbar icon > Printer Settings > Maintenance tab > Power Ink Flushing. Mac: Open Printer Utility > Power Ink Flushing. Afterwards, turn the printer off and wait at least 12 hours before printing.
Source: L1300/L1800 User's Guide (CPD-40326), pp.70-74 'Print Head Cleaning' and 'Flushing the Ink Tubes Using a Computer Utility' (files.support.epson.com). Last checked .
Nozzle check
- Product buttons: press the power button to turn the printer off.
- Load a few sheets of plain paper.
- Hold down the paper button and press the power button to turn the printer on. Release both buttons once it turns on.
- The nozzle check pattern prints. No gaps: the head is clean. Gaps or a faint pattern: clean the print head.
- Computer utility: Windows: right-click the product icon in the taskbar. Mac: System Preferences > Print & Fax / Print & Scan / Printers & Scanners > select the product > Options & Supplies > Utility > Open Printer Utility.
- Select Nozzle Check and click Print. No gaps: click Finish. Gaps or faint: clean the print head.
Source: L1300/L1800 User's Guide (CPD-40326), p.67 'Checking the Nozzles Using the Product Buttons' / 'Using a Computer Utility' (files.support.epson.com). Last checked .
Note: Older guide (OS X 10.5-10.9 era). USB-only model, so the guide has no network status sheet. Limit: up to 3 cleanings, then turn off and wait at least 12 hours.
Canon PIXMA TS3500 series (TS3520 etc.)TS3520, TS3522, TS3530, TS3550i, TS3551i, TS3500 seriesInkjet
Cleaning
- Make sure the printer is turned on.
- Press the Setup button until 2 appears on the LCD.
- Press the Black button or the Color button to start cleaning (about 1 minute); it is finished when the ON lamp lights after flashing.
- Print the nozzle check pattern to check the result.
- If the problem remains after cleaning twice, run Deep Cleaning: press the Setup button until 3 appears on the LCD, then press the Black button or the Color button (about 1 to 2 minutes).
- If still not resolved, turn off the power and deep clean again after 24 hours; if it persists, replace the FINE cartridge.
Source: Canon : Inkjet Manuals : TS3500 series : Cleaning the Print Head (ij.manual.canon). Last checked .
Nozzle check
- Make sure the printer is turned on.
- Load one sheet of A4 or Letter-sized plain paper in the rear tray.
- Press the Setup button until 1 appears on the LCD.
- Press the Black button or the Color button; the nozzle check pattern prints. Do nothing else until printing finishes.
- Examine the pattern: look for missing lines in pattern A and horizontal white streaks in pattern B. If either appears, or any color in pattern A or B does not print (e.g. magenta), clean the print head.
Source: Canon : Inkjet Manuals : TS3500 series : Printing the Nozzle Check Pattern (ij.manual.canon). Last checked .
Note: Two-segment LCD model: functions are selected by pressing Setup until a number appears. Low ink prevents the nozzle check and alignment sheet from printing correctly; replace the low FINE cartridge first.
Canon PIXMA TS6400 series (TS6420)TS6420, TS6420a, TS6400 seriesInkjet
Cleaning
- Make sure the printer is turned on and load a sheet of A4 or Letter-sized plain paper in the cassette.
- Press the OK button, select Maintenance, then select Cleaning.
- Select Yes on the confirmation screen; cleaning takes about 2 minutes.
- On the pattern print confirmation screen select Yes, press the OK button to print the nozzle check pattern, select Next, and examine it.
- If the problem persists after cleaning twice, select Maintenance > Deep Cleaning > Yes (about 1 to 2 minutes), then print and check the pattern.
- If still not resolved, turn off the power and deep clean again after 24 hours; if it persists, replace the FINE cartridge.
Source: Canon : Inkjet Manuals : TS6400 series : Cleaning the Print Head (ij.manual.canon). Last checked .
Nozzle check
- Make sure the printer is turned on.
- Load a sheet of A4 or Letter-sized plain paper in the cassette.
- Press the OK button, select Maintenance, then select Nozzle Check.
- Select Yes on the confirmation screen and press the OK button; the pattern prints and two pattern confirmation screens appear on the LCD.
- Select Next and examine the pattern: check pattern C for missing lines and pattern D for horizontal white streaks.
- If both look fine select All A; if either shows problems (or a color is missing) select Also B, then Yes to start cleaning.
Source: Canon : Inkjet Manuals : TS6400 series : Printing the Nozzle Check Pattern (ij.manual.canon). Last checked .
Note: On this model the examine page labels the printed patterns C (lines) and D (streaks); A/B are the on-screen answer choices.
Canon PIXMA TS8300 series (TS8320 etc.)TS8320, TS8322, TS8340, TS8350, TS8351, TS8352, TS8360, TS8370Inkjet
Cleaning
- Make sure the printer is turned on and load a sheet of A4 or Letter-sized plain paper in the cassette.
- On the HOME screen select Setup, then Maintenance, then Cleaning.
- Select Yes; cleaning takes about 1 minute.
- At the pattern print confirmation select Yes to print the nozzle check pattern, then examine it.
- If the problem persists after cleaning twice, select Setup > Maintenance > Deep Cleaning > Yes (about 1 to 2 minutes), print the pattern and select OK at completion.
- If a particular color still prints poorly, replace that ink tank; if not resolved, turn off the power and deep clean again after 24 hours; if still unresolved, contact a Canon service center.
Source: Canon : PIXMA Manuals : TS8300 series : Cleaning the Print Head (ij.manual.canon). Last checked .
Nozzle check
- Make sure the printer is turned on and load one sheet of A4 or Letter-sized plain paper in the cassette.
- On the HOME screen select Setup, then Maintenance, then Nozzle Check.
- Select Yes; the operation panel opens, the output tray extends and the pattern prints, followed by two pattern confirmation screens.
- Examine the pattern: pattern C for missing lines, pattern D for horizontal white streaks.
- Select All A if both look fine; otherwise (or if a color is missing) select Also B, then Yes to clean.
Source: Canon : PIXMA Manuals : TS8300 series : Printing the Nozzle Check Pattern (ij.manual.canon). Last checked .
Note: Uses individual ink tanks (not FINE cartridges). TS9500 series (TS9520) was not separately verified.
Canon PIXMA MG3600 series (MG3620 etc.)MG3610, MG3620, MG3640, MG3650, MG3660, MG3670, MG3680, MG3600 seriesInkjet
Cleaning
- Make sure the power is on.
- Hold down the Stop button until the Alarm lamp flashes twice, then release it immediately; cleaning takes about 1 to 2 minutes and ends when the ON lamp lights after flashing.
- Print the nozzle check pattern to check the result.
- If the problem persists after cleaning twice, deep clean: hold down the Stop button until the Alarm lamp flashes three times, then release it (about 1 to 2 minutes).
- If still not resolved, turn off the power and deep clean again after 24 hours (do not unplug); if it persists, replace the FINE cartridge, then contact the service center.
Source: Canon : PIXMA Manuals : MG3600 series : Cleaning the Print Head (ij.manual.canon). Last checked .
Nozzle check
- Make sure the power is on.
- Load one sheet of A4 or Letter-sized plain paper in the front tray.
- Open the output tray extension, open the paper output tray, then extend the paper output support.
- Hold down the Stop button until the Alarm lamp flashes once, then release it immediately; the pattern prints.
- Examine the pattern: missing lines in pattern A or horizontal white streaks in pattern B mean the print head needs cleaning.
Source: Canon : PIXMA Manuals : MG3600 series : Printing the Nozzle Check Pattern (ij.manual.canon). Last checked .
Note: No-LCD model: functions are chosen by counting Alarm lamp flashes while holding Stop (1 nozzle check, 2 cleaning, 3 deep cleaning, 4 alignment, 6 alignment values).
Canon PIXMA MX920 series (MX922)MX922, MX920 seriesInkjet
Cleaning
- Make sure the power is on, load A4 or Letter plain paper in the lower cassette, open the output tray and close the inner cover.
- Press MENU, select Setup > Maintenance > Cleaning (press OK after each), then select Yes and press OK; cleaning takes about 2 minutes.
- At the pattern print confirmation select Yes and press OK, then examine the nozzle check pattern.
- If the problem persists after cleaning twice, select MENU > Setup > Maintenance > Deep cleaning > Yes (about 2 minutes), then print the pattern.
- If a specific color still prints poorly, replace that ink tank; otherwise turn off the power (do not unplug) and deep clean again after 24 hours; if still unresolved, contact the service center.
Source: Canon : PIXMA Manuals : MX920 series : Cleaning the Print Head (ij.manual.canon). Last checked .
Nozzle check
- Make sure the power is on and load A4 or Letter plain paper in the lower cassette.
- Open the paper output tray, extend the output support, and close the inner cover if open.
- Press the MENU button, select Setup and press OK, then select Maintenance and press OK.
- Select Print nozzle check pattern and press OK, then select Yes and press OK; the pattern prints.
- Compare pattern (1) for missing lines and pattern (2) for horizontal white streaks; select All A if both are fine, or Also B and then Yes to start cleaning.
Source: Canon : PIXMA Manuals : MX920 series : Printing the Nozzle Check Pattern (ij.manual.canon). Last checked .
Note: Auto head alignment requires Matte Photo Paper MP-101 or the supplied paper; plain paper is only for manual alignment. The MX920 series manual top page does not list individual model numbers; MX922 is assigned to this series by Canon's series naming.
Canon PIXMA MegaTank G3060 series (G3260 etc.)G3260, G3262, G3060, G3160, G3360, G3460, G3560, G3660Inkjet
Cleaning
- Make sure the printer is turned on.
- Press the Setup button, select Maintenance with the left/right buttons, and press OK.
- Select Cleaning and press OK (about 1 minute), then print the nozzle check pattern.
- If the problem persists after cleaning twice, select Maintenance > Deep Cleaning and press OK (about 2 to 3 minutes), then check the pattern.
- If still not resolved, turn off the power and deep clean again after 24 hours.
- If still not resolved, run Ink Flush: Setup > Maintenance > Ink Flush > choose All colors, Color, or BK > OK > OK > Yes > Yes (about 5 to 6 minutes). Check ink levels are above the single dot and the maintenance cartridge has space first.
Source: Canon : Inkjet Manuals : G3060 series : Cleaning the Print Head (ij.manual.canon). Last checked .
Nozzle check
- Make sure the printer is turned on.
- Load one sheet of A4 or Letter-sized plain paper in the rear tray.
- Press the Setup button, use the left/right buttons to select Maintenance, and press OK.
- Select Nozzle check and press OK; the pattern prints.
- Examine it: missing lines in pattern A or horizontal white streaks in pattern B (or a color not printing) mean the print head needs cleaning.
Source: Canon : Inkjet Manuals : G3060 series : Printing the Nozzle Check Pattern (ij.manual.canon). Last checked .
Note: Ink Flush is this series' equivalent of the strongest cleaning; the macOS Remote UI exposes Cleaning, Deep Cleaning and Ink Flush (not named 'System Cleaning'). If Ink Flush does not help, Canon says replacing the print head may resolve the issue.
Canon PIXMA MegaTank G6000 series (G6020 etc.)G6020, G6010, G6011, G6030, G6040, G6045, G6050, G6055Inkjet
Cleaning
- Make sure the printer is turned on.
- Press the Setup button, select Maintenance, and press OK.
- Select Cleaning and press OK (about 2 minutes), then print the nozzle check pattern.
- If the problem persists after cleaning twice, select Maintenance > Deep Cleaning and press OK (about 1 minute).
- If still not resolved, turn off the power (do not unplug) and deep clean again after 24 hours.
- If still not resolved, run Ink Flush: Setup > Maintenance > Ink Flush > All colors, Color, or BK > OK > OK > Yes > Yes (about 8 minutes); refill any tank below the single dot first.
Source: Canon : Inkjet Manuals : G6000 series : Cleaning the Print Head (ij.manual.canon). Last checked .
Nozzle check
- Make sure the printer is turned on.
- Load a sheet of A4 or Letter-sized plain paper in the cassette.
- Press the Setup button, select Maintenance with the left/right buttons, and press OK.
- Select Nozzle check and press OK; the pattern prints.
- Examine it: missing lines in pattern A or horizontal white streaks in pattern B (or a missing color) mean the print head needs cleaning.
Source: Canon : Inkjet Manuals : G6000 series : Printing the Nozzle Check Pattern (ij.manual.canon). Last checked .
Note: G7000 series (G7020) deep cleaning page shows the same Setup > Maintenance > Deep Cleaning path (about 1 minute; 24-hour retry; do not unplug): https://ij.manual.canon/ij/webmanual/Manual/All/G7000%20series/EN/UG/ug-136.html. Other G7000 procedures were not individually fetched.
Canon PIXMA MegaTank G3000 series (G3200 etc., no LCD)G3000, G3100, G3102, G3200, G3400, G3500, G3600, G3800Inkjet
Cleaning
- Make sure the printer is turned on.
- Hold down the Stop button until the Alarm lamp flashes twice, then release it immediately; cleaning takes about 1 minute and ends when the ON lamp lights after flashing.
- Print the nozzle check pattern to check the result.
- If the problem persists after cleaning twice, deep clean: hold down the Stop button until the Alarm lamp flashes three times, then release it (about 3 minutes).
- If deep cleaning does not help, perform System Cleaning from a computer (macOS: Canon IJ Printer Utility > Cleaning > System Cleaning, choose ink group, OK).
- If System Cleaning does not help, turn off the printer, wait 24 hours, and deep clean again; if still unresolved, the print head may be damaged - contact the service center.
Source: Canon : PIXMA Manuals : G3000 series : Cleaning the Print Head (ij.manual.canon). Last checked .
Nozzle check
- Make sure the printer is turned on.
- Load one sheet of A4 or Letter-sized plain paper in the rear tray.
- Pull out the paper output tray and open the output tray extension.
- Hold down the Stop button until the Alarm lamp flashes once, then release it immediately; the pattern prints.
- Examine it: missing lines in pattern A or horizontal white streaks in pattern B mean the print head needs cleaning.
Source: Canon : PIXMA Manuals : G3000 series : Printing the Nozzle Check Pattern (ij.manual.canon). Last checked .
Note: System Cleaning (computer only) 'consumes an extremely large amount of ink'; before running it, all inks in the chosen group must be at least at the single-dot mark (fill to the upper limit line if Remaining Ink Notification is enabled).
Canon imagePROGRAF / PIXMA PRO-200 seriesPRO-200, PRO-200 seriesInkjet
Cleaning
- Make sure the printer is on and load a sheet of A4 or Letter-sized plain paper in the top feed.
- On the HOME screen select Maintenance > Print Head Cleaning > Cleaning.
- Choose the ink group: All colors, Pattern 1: PC / M / Y / PM, or Pattern 2: C / BK / LGY / GY, then select Yes (about 1 minute).
- Select Yes to print the nozzle check pattern and examine it.
- If the problem persists after cleaning twice, select Maintenance > Print Head Cleaning > Deep Cleaning, choose the ink group, select Yes (about 1 minute), print the pattern and select OK.
- If a particular color still prints poorly, replace that ink tank; otherwise turn off the power and deep clean again after 24 hours; if still unresolved, contact a Canon service center.
Source: Canon : imagePROGRAF Manuals : PRO-200 series : Cleaning the Print Head (ij.manual.canon). Last checked .
Nozzle check
- Make sure the printer is turned on.
- Load a sheet of A4 or Letter-sized plain paper in the top feed.
- On the HOME screen select Maintenance, then Nozzle Check.
- Select Yes; the pattern prints and two pattern confirmation screens appear.
- Check for missing lines. If none, select All A; if lines are missing or a color does not print, select Also B, then Yes, and choose the ink group with missing lines to clean.
Source: Canon : imagePROGRAF Manuals : PRO-200 series : Printing the Nozzle Check Pattern (ij.manual.canon). Last checked .
Note: Ink groups: Pattern 1 = PC / M / Y / PM, Pattern 2 = C / BK / LGY / GY.
Canon PIXMA PRO-100SPRO-100S, PRO-100S seriesInkjet
Cleaning
- Make sure the power is on.
- Hold down the RESUME/CANCEL button until the POWER lamp flashes once, then release it immediately; all colors are cleaned (about 2 to 3 minutes) and the POWER lamp lights when done.
- Print the nozzle check pattern to check the result.
- If the problem persists after cleaning twice, run Deep Cleaning from the computer: printer driver Maintenance tab > Deep Cleaning, select the ink group, click Execute, then OK.
- If not improved, turn off the printer, wait 24 hours, and run Deep Cleaning again; if still unresolved, contact the service center.
Source: Canon : PIXMA Manuals : PRO-100S series : Cleaning the Print Head (ij.manual.canon). Last checked .
Nozzle check
- Make sure the power is on.
- Load a sheet of A4 or Letter-sized plain paper in the rear tray (the manual feed tray cannot be used).
- Open the paper output tray, pull out the extension, and close the disc tray guide if open.
- Hold down the RESUME/CANCEL button until the POWER lamp flashes twice, then release it immediately; the pattern prints.
- Check for horizontal white streaks: pattern A covers PC/M/Y/PM, pattern B covers C/BK/LGY/GY. Clean the affected group from the computer, or all colors if both show streaks.
Source: Canon : PIXMA Manuals : PRO-100S series : Printing the Nozzle Check Pattern (ij.manual.canon). Last checked .
Note: Deep cleaning is not available from the printer buttons on this model; it is run from the computer. Original PRO-100, PRO-10 and PRO-1000 manuals were not verified.
Canon imageCLASS MF650C series (MF656Cdw)MF656Cdw, MF654Cdw, MF653Cdw, MF652CwLaser
Cleaning
- Make sure no documents are waiting to print.
- Select <Menu> on the Home screen, then <Adjustment/Maintenance> > <Maintenance> > <Clean ITB>.
- Select <Start>; press the Home key when the completion message appears.
Source: Cleaning the Transfer Belt (ITB) - imageCLASS MF656Cdw / MF654Cdw / MF653Cdw / MF652Cw User's Guide (oip.manual.canon). Last checked .
Not listed here: nozzle check. We could not confirm these steps in an official source for this family, so check your printer’s manual.
Note: Gradation calibration: <Menu> > <Adjustment/Maintenance> > <Adjust Image Quality> > <Auto Adjust Gradation> > <Quick Adjust> or <Full Adjust> (Full Adjust prints two adjustment images that are scanned face down on the platen, black stripe toward the back). Canon warns frequent calibration may affect toner cartridge life. Source: https://oip.manual.canon/USRMA-6621-zz-SSM-650-enUS/contents/devu-mainte-ajst_imaqua-gradation.html. Clean the fixing assembly after replacing a toner cartridge or if black streaks appear.
Brother HL-L2300 series mono laser (HL-L2325DW/HL-L2350DW/HL-L2370DW)HL-L2325DW, HL-L2350DW, HL-L2370DW, HL-L2370DWXL, HL-L2379DWLaser
Cleaning
- Drum Dot Print (for dots or repeating marks at 94 mm / 3.7 in.): make sure the machine is in Ready mode.
- Press ▲ or ▼ to show [Print Reports] and press OK, select [Drum Dot Print], then press Go to print the Drum Dot Check Sheet.
- Press and hold the power button to turn the machine off, open the front cover and remove the toner cartridge and drum unit assembly.
- Push down the green lock lever and take the toner cartridge out of the drum unit.
- Turn the drum unit so the drum gear is on the left; use the numbered markers next to the drum roller to match the dot column on the check sheet.
- Turn the drum by the wheel on the end (do not touch the drum surface) and wipe the mark gently with a dry cotton swab. No sharp objects or liquids.
- Push the toner cartridge back into the drum unit until it locks, reinstall the assembly, close the front cover and turn the machine on.
Source: Clean the Drum Unit Using Drum Dot Print (support.brother.com). Last checked .
Not listed here: nozzle check. We could not confirm these steps in an official source for this family, so check your printer’s manual.
Note: No print alignment procedure exists for these mono lasers. testPage = Printer Settings report; qualityReport = Test Print (Brother: 'If you have a print quality problem, print a test page first'). Corona wire cleaning (if print quality problems or [Drum !] shows): open front cover, remove toner/drum assembly, gently slide the green tab left-right several times, return it to Home (▲) so the arrows align (otherwise vertical stripe), reinstall: https://support.brother.com/g/s/id/htmldoc/printer/cv_hll2310d/use/html/GUID-F406D846-93AB-4C32-ABE0-C31497BAAAE0_146.html.
Brother HL-L2400 series mono laser (HL-L2400D/HL-L2460DW)HL-L2400D, HL-L2405W, HL-L2420DW, HL-L2460DW, HL-L2460DWXL, HL-L2865DWLaser
Cleaning
- Drum Dot Print (for dots/marks repeating at 94 mm / 3.7 in.): make sure the machine is in Ready mode.
- HL-L2400D: press Go eight (8) times to print the Drum Dot Check Sheet.
- LCD models: press ▲ or ▼ to show [Print Reports] and press OK, select [Drum Dot Print] and press OK, then press Go to print the Drum Dot Check Sheet; press Back twice.
- Press and hold the power button to turn the machine off, open the front cover and remove the toner cartridge and drum unit assembly.
- Push down the green lock lever and take the toner cartridge out of the drum unit.
- Turn the drum unit so the drum gear is on the left; use the numbered markers next to the drum roller to match the dot column on the check sheet.
- Rotate the drum by the end wheel only (do not touch the drum surface) and wipe the mark gently with a dry cotton swab. Do not use sharp objects or liquids.
- Push the toner cartridge back into the drum unit until it locks, reinstall the assembly, close the front cover and turn the machine on.
Source: Clean the Drum Unit (support.brother.com). Last checked .
Not listed here: nozzle check. We could not confirm these steps in an official source for this family, so check your printer’s manual.
Note: No-screen HL-L2400D button combos (exact, from Brother's guide): Go x3 = Printer Settings page; Go x8 = Drum Dot Check Sheet. The Test Print page lists only the LCD models (HL-L2405W/L2420DW/L2460DW/L2460DWXL/L2865DW); no Go-button test print for HL-L2400D was found. Corona wire cleaning (slide green tab left/right several times, return it to Home ▲): https://support.brother.com/g/s/id/htmldoc/printer/cv_hll2460dw/use/html/GUID-F406D846-93AB-4C32-ABE0-C31497BAAAE0_1.html. No print alignment procedure (mono laser).
Brother MFC/DCP-L2700 series mono laser all-in-one (MFC-L2710DW/MFC-L2750DW)MFC-L2710DW, MFC-L2717DW, MFC-L2730DW, MFC-L2750DW, MFC-L2750DWXL, MFC-L2759DW, MFC-L2690DW, MFC-L2690DWXLLaser
Cleaning
- Drum Dot Print (for marks repeating at 94 mm / 3.7 in.): make sure the machine is in Ready mode.
- 2-line LCD models: press ▲ or ▼ to show [Print Reports] and press OK, select [Drum Dot Print], then press Start.
- Touchscreen models: press [Settings] > [All Settings] > [Print Reports] > [Drum Dot Print], press [Yes], then press the Home icon.
- Press and hold the power button to turn off the machine, open the front cover and remove the toner cartridge and drum unit assembly.
- Push down the green lock lever and take the toner cartridge out of the drum unit.
- Turn the drum unit so the drum gear is on the left; use the numbered markers next to the drum roller to locate the mark matching the check sheet column.
- Turn the drum by its end wheel (do not touch the surface) and gently wipe the mark with a dry cotton swab. No sharp objects or liquids.
- Push the toner cartridge back in until it locks, reinstall the assembly, close the front cover and turn the machine on.
Source: Clean the Drum Unit Using Drum Dot Print (support.brother.com). Last checked .
Not listed here: nozzle check. We could not confirm these steps in an official source for this family, so check your printer’s manual.
Note: Brother's Reports page for this guide lists Printer Settings (current printer settings), User Settings, Network Configuration, Drum Dot Print, WLAN Report and fax reports: https://support.brother.com/g/s/id/htmldoc/mfc/cv_mfcl2750dw/use/html/GUID-87ACF115-CEEF-447D-9374-4DCC579DBBB7_427.html. Corona wire cleaning (green tab, return to Home ▲): https://support.brother.com/g/s/id/htmldoc/mfc/cv_mfcl2750dw/use/html/GUID-F406D846-93AB-4C32-ABE0-C31497BAAAE0_394.html. No print alignment procedure (mono laser).
Brother HL-L3200 series color LED printer (HL-L3270CDW)HL-L3210CW, HL-L3230CDN, HL-L3230CDW, HL-L3270CDWLaser
Cleaning
- Drum Dot Print (for black/white dots or marks repeating at 94 mm / 3.7 in.): make sure the machine is in Ready Mode.
- HL-L3210CW/HL-L3230CDN/HL-L3230CDW: press ▲ or ▼ to show [Print Reports] and press OK, select [Drum Dot Print] and press OK, then press Go.
- HL-L3270CDW: press [Settings] > [All Settings] > [Print Reports] > [Drum Dot Print], then press [Yes].
- Press and hold the power button to turn off the machine and open the top cover until it locks open.
- The dot colour on the Drum Dot Check Sheet tells you which drum to clean; remove that colour's toner cartridge and drum unit assembly.
- Push down the green lock lever and remove the toner cartridge from the drum unit. Touch only the drum unit gear.
- Lift the drum frame by the handle, rotate it counterclockwise, find the drum gear on the right side, and tilt the frame so the numbered grid is visible.
- Rotate the drum by the gear, use the column numbers to locate the mark, and wipe it gently with a dry cotton swab. No sharp objects or liquids.
- Reinsert the toner into the drum unit until it locks, slide the assembly back into the matching colour slot, close the top cover and turn the machine on.
Source: Clean the Drum Unit (support.brother.com). Last checked .
Not listed here: nozzle check. We could not confirm these steps in an official source for this family, so check your printer’s manual.
Note: testPage omitted: no step page for the Printer Settings report was found in this guide (Test Print is recorded as qualityReport). Alignment = Brother's Color Registration (use when solid areas show cyan, magenta or yellow fringes). Related: Calibrate Color Output (Printer > Color Correction > Calibration > Calibrate on LCD models; Toner > Calibration > Calibrate on HL-L3270CDW; takes a few minutes): https://support.brother.com/g/s/id/htmldoc/printer/cv_hll3210cw/use/html/GUID-57B9BD74-B65D-44AA-AAC8-2A8E65D6C09F_200.html. Clean LED heads (power off, open top cover, wipe each LED head window with a dry, soft, lint-free cloth): https://support.brother.com/g/s/id/htmldoc/printer/cv_hll3210cw/use/html/GUID-DBF662AB-0E29-4373-BA29-D0575E121BB5_195.html. Corona wires (slide green tab on each drum, return to Home ▲): https://support.brother.com/g/s/id/htmldoc/printer/cv_hll3210cw/use/html/GUID-F0972AB4-CC3A-46B9-BB0C-F7039035A842_197.html.
Brother MFC-L3700 series color LED all-in-one (MFC-L3770CDW)MFC-L3710CW, MFC-L3750CDW, MFC-L3770CDW, HL-L3290CDW, DCP-L3551CDWLaser
Cleaning
- Drum Dot Print (for black/white dots or marks repeating at 94 mm / 3.7 in.): make sure the machine is in Ready Mode.
- HL-L3290CDW/DCP-L3551CDW: press Menu, select [Print Reports] (OK), then [Drum Dot Print] (OK).
- MFC models: press [Settings] > [All Settings] > [Print Reports] > [Drum Dot Print], then press [Yes].
- Press and hold the power button to turn off the machine and open the top cover until it locks open.
- The dot colour on the Drum Dot Check Sheet shows which drum to clean; remove that colour's toner cartridge and drum unit assembly.
- Push down the green lock lever and remove the toner cartridge. Touch only the drum unit gear.
- Lift the drum frame by the handle, rotate it counterclockwise, locate the drum gear inside the right side, and tilt the frame so the numbered grid is visible.
- Rotate the drum by the gear, use the column numbers to find the mark, and wipe it gently with a dry cotton swab. No sharp objects or liquids.
- Reinsert the toner until it locks, slide the assembly into the matching colour slot, close the top cover and turn the machine on.
Source: Clean the Drum Unit (support.brother.com). Last checked .
Not listed here: nozzle check. We could not confirm these steps in an official source for this family, so check your printer’s manual.
Note: testPage = Print Reports (choose Printer Settings or another report); qualityReport = Test Print. Alignment = Color Registration. Related: Calibrate Color Output (Menu > Printer > Clr Correction > Calibration > Calibrate on LCD models; Toner > Calibration > Calibrate on MFC models; takes a few minutes): https://support.brother.com/g/s/id/htmldoc/mfc/cv_hll3290cdw/use/html/GUID-57B9BD74-B65D-44AA-AAC8-2A8E65D6C09F_404.html. Clean LED heads: https://support.brother.com/g/s/id/htmldoc/mfc/cv_hll3290cdw/use/html/GUID-DBF662AB-0E29-4373-BA29-D0575E121BB5_399.html. Corona wires: https://support.brother.com/g/s/id/htmldoc/mfc/cv_hll3290cdw/use/html/GUID-F0972AB4-CC3A-46B9-BB0C-F7039035A842_401.html.
Brother MFC-J1010DW / MFC-J1170DW inkjet all-in-oneMFC-J1010DW, MFC-J1012DW, MFC-J1170DWInkjet
Cleaning
- MFC-J1010DW/MFC-J1012DW: press the Ink button.
- Press ▲ or ▼ to select [Print Head Cleaning] and press OK.
- Select [Black only], [Color only] or [All] and press OK.
- Select [Normal], [Strong] or [Strongest] and press OK.
- Press ►. The machine cleans the print head.
- MFC-J1170DW: press [Ink] > [Print Head Cleaning], choose [Black only]/[Color only]/[All], then [Normal]/[Strong]/[Strongest], and press [Start].
- If quality has not improved, repeat; if it still does not improve after several repeats, contact Brother Customer Service.
Source: Clean the Print Head from Your Brother Machine (support.brother.com). Last checked .
Nozzle check (Brother calls it Print Quality Check)
- MFC-J1010DW/MFC-J1012DW: press the Ink button.
- Press ▲ or ▼ to select [Impr. PrintQuality] and press OK, then select [Impr. PrintQuality] again and press OK.
- Press ► to print the check sheet, and check the four colour blocks.
- If all lines are clear, press ◄ to select [No] to finish. If lines are missing, press ► to select [Yes].
- For each colour, press ◄ or ► to pick the pattern (1-4) closest to the printout and press OK.
- If cleaning is needed, press ► to start it; afterwards press ► [Yes] and ► again to reprint and recheck the sheet.
- MFC-J1170DW: press [Ink] > [Improve Print Quality] > [Check Print Quality], then [Start]; answer [No]/[Yes] and pick patterns 1-4 on the touchscreen; press [Start] to clean if prompted.
Source: Check the Print Quality (support.brother.com). Last checked .
Note: Brother has no separate 'nozzle check'; its Print Quality Check sheet (Check the Print Quality) contains the nozzle check pattern, so nozzleCheck maps to the same procedure. No Test Print exists on these inkjets; testPage maps to Print Reports (Brother's Reports page lists User Settings, Network Configuration, WLAN Report, fax reports: https://support.brother.com/g/s/id/htmldoc/mfc/cv_mfc1010dw/use/html/GUID-E0E33870-A13E-4BA6-8A91-1B8205912BC0_1.html). Brother warns: do not touch the print head; cleaning uses ink and cleaning too often wastes ink.
Brother MFC-J4335DW / MFC-J4535DW inkjet all-in-oneMFC-J4335DW, MFC-J4345DW, MFC-J4535DWInkjet
Cleaning
- MFC-J4335DW/MFC-J4345DW: press the Ink button.
- Press ▲ or ▼ to select [Print Head Cleaning] and press OK.
- Select [Black only], [Color only] or [All] and press OK, then [Normal], [Strong] or [Strongest] and press OK.
- Press ►. The machine cleans the print head.
- Special cleaning (only after several normal cleanings did not help; uses the most ink): press the Ink button, select [Print Head Cleaning] and press OK, then press Settings and OK at the same time.
- MFC-J4535DW: press [Ink] > [Print Head Cleaning], choose [Black only]/[Color only]/[All] and [Normal]/[Strong]/[Strongest], press [Start]. Special cleaning: [Ink] > [Print Head Cleaning], then press the X (cancel) icon for five seconds.
Source: Clean the Print Head from Your Brother Machine (support.brother.com). Last checked .
Nozzle check (Brother calls it Print Quality Check)
- MFC-J4335DW/MFC-J4345DW: press the Ink button.
- Press ▲ or ▼ to select [Impr. PrintQuality] and press OK, then select [Impr. PrintQuality] again and press OK.
- Press ► to print the check sheet, and check the four colour blocks.
- If all lines are clear, press ◄ to select [No] to finish. If lines are missing, press ► to select [Yes].
- For each colour, press ◄ or ► to pick the pattern (1-4) closest to the printout and press OK.
- If cleaning is needed, press ► to start it; afterwards press ► [Yes] and ► again to reprint and recheck.
- MFC-J4535DW: press [Ink] > [Improve Print Quality] > [Check Print Quality], then [Start]; answer on the touchscreen and press [Start] to clean if prompted.
Source: Check the Print Quality (support.brother.com). Last checked .
Note: nozzleCheck maps to Brother's Check the Print Quality (Print Quality Check sheet with nozzle check pattern). testPage maps to Print Reports (no Test Print on inkjets; User Settings report lists current settings). The X icon used for MFC-J4535DW special cleaning was identified from the guide's icon image (red X).
Brother MFC-J5855DW / MFC-J5955DW inkjet all-in-one (11x17)MFC-J5855DW, MFC-J5955DW, MFC-J5340DWInkjet
Cleaning
- Press [Ink] > [Print Head Cleaning].
- Press [Start]. The machine cleans the print head.
- Special cleaning (only if several cleanings did not help; uses the most ink): press [Ink] > [Print Head Cleaning], then press the X (cancel) icon for five seconds.
Source: Clean the Print Head from Your Brother Machine (support.brother.com). Last checked .
Nozzle check (Brother calls it Print Quality Check)
- Press [Ink] > [Improve Print Quality] > [Check Print Quality].
- Press [Start] to print the check sheet, and check the four colour blocks.
- If all lines are clear, press [No], then the Home icon. If lines are missing, press [Yes].
- For each colour, press the number of the pattern (1-4) that best matches the printout.
- If cleaning is needed, press [Start]; afterwards press [Yes] and [Start] to reprint and recheck the sheet.
Source: Check the Print Quality (support.brother.com). Last checked .
Note: The US guide page for this model group shows a single cleaning flow ([Ink] > [Print Head Cleaning] > [Start]) without the Normal/Strong/Strongest choice. These models also have [Ink] > [Print Quality Auto Check] (default On) which detects clogged nozzles and cleans automatically: https://support.brother.com/g/s/id/htmldoc/mfc/cv_mfc5955dw/use/html/GUID-BAFB07B9-4408-42EA-ACD8-BBA52BB4D0A2_1.html. nozzleCheck maps to Check the Print Quality.
Brother INKvestment Tank MFC-J995DW / MFC-J805DW / MFC-J815DWMFC-J995DW, MFC-J995DWXL, MFC-J805DW, MFC-J815DWInkjet
Cleaning
- MFC-J995DW: press [Settings] > [Maintenance] > [Print Head Cleaning].
- Press [Black only], [Color only] or [All], then [Normal], [Strong] or [Strongest].
- Press [Start]. The machine cleans the print head.
- MFC-J805DW/MFC-J815DW: press Settings, select [General Setup] > [Maintenance] > [Print Head Cleaning] > Black only/Color only/All > Normal/Strong/Strongest (OK each), then press ►.
- If print has not improved, install a new genuine cartridge for each problem colour and clean again; if still not improved, contact Brother Customer Service.
Source: Clean the Print Head from Your Brother Machine (support.brother.com). Last checked .
Nozzle check (Brother calls it Print Quality Check)
- MFC-J995DW: press [Settings] > [Maintenance] > [Improve Print Quality] > [Check Print Quality].
- Press [Start] to print the Print Quality Check Sheet, and check the four colour blocks.
- If all lines are clear, press [No], then the Home icon. If lines are missing, press [Yes].
- For each colour, press the number of the pattern (1-4) that best matches the printout.
- If cleaning is needed, press [Start]; afterwards press [Yes] and [Start] to reprint and recheck.
- MFC-J805DW/MFC-J815DW: press Settings, then ▲/▼ to select [General Setup] > [Maintenance] > [Impr. PrintQuality] > [Impr. PrintQuality] (OK each), press ► to print, and answer with ◄/► as prompted.
Source: Check the Print Quality (support.brother.com). Last checked .
Note: Brother USA markets the MFC-J995DW as 'INKvestment Tank Color Inkjet All-in-One Printer' (https://www.brother-usa.com/products/mfcj995dw, now discontinued). On these models Print Quality / Cleaning live under Settings > Maintenance rather than an Ink button. nozzleCheck maps to Check the Print Quality (Print Quality Check Sheet).
HP HP Smart Tank (button control panel: 5000/5100, 660-670, 710-720, 750 series)Smart Tank 5000, Smart Tank 5100 series, Smart Tank 660-670 series, Smart Tank 710-720 series, Smart Tank 750 seriesInkjet
Cleaning
- Clean only if the diagnostics page shows streaks or missing parts of the color or black boxes, because cleaning uses ink.
- EWS (Wi-Fi models): open the Embedded Web Server and click the Tools tab.
- In the left menu, click Utilities > Print Quality Toolbox.
- Click the button next to the clean printheads option.
- Windows alternative: HP printer software > Print & Scan > Maintain Your Printer > Device Services tab > choose the clean option and follow the prompts.
Source: HP Smart Tank 5000 (HP Smart Tank 5100 series) User Guide - Align and clean printheads (kaas.hpcloud.hp.com). Last checked .
Not listed here: nozzle check. We could not confirm these steps in an official source for this family, so check your printer’s manual.
Note: The Smart Tank 660-670 / 710-720 / 750 User Guide (https://kaas.hpcloud.hp.com/pdf-public/pdf_3331993_en-US-1.pdf) gives the same support-mode button steps and the same EWS Print Quality Toolbox path. It also adds that pressing the Information button once, without holding it, prints the printer information page. HP's guides only list Windows software for cleaning and alignment on these models; no control-panel button combination is documented for them.
HP HP Smart Tank (touchscreen: 7600, 790 series)Smart Tank 7600 series, Smart Tank 790 seriesInkjet
Cleaning
- Load Letter or A4 unused plain white paper.
- On the Home screen, touch Menu, then scroll down to touch Tools.
- Touch Troubleshooting > Print Quality, then select the clean printheads option.
- Clean only when needed; the cleaning prints one page and uses ink.
Source: User Guide HP Smart Tank 7600 series - To align or clean the printheads from the printer control panel (kaas.hpcloud.hp.com). Last checked .
Not listed here: nozzle check. We could not confirm these steps in an official source for this family, so check your printer’s manual.
Note: The Smart Tank 790 series User Guide (https://kaas.hpcloud.hp.com/pdf-public/pdf_3347590_en-US-1.pdf) has the same report and align/clean sections, with matching wording.
HP HP Smart Tank 500 seriesSmart Tank 500 series, Smart Tank 500Inkjet
Cleaning
- Clean only if the diagnostics page shows streaks or missing parts of the color or black boxes.
- Windows: HP printer software > Print & Scan > Maintain Your Printer > Device Services tab > choose the clean option and follow the prompts.
- Mac: open HP Utility, select the printer, click Clean Printheads, then follow the prompts.
Source: User Guide HP Smart Tank 500 series - Clean printheads (h10032.www1.hp.com). Last checked .
Not listed here: nozzle check. We could not confirm these steps in an official source for this family, so check your printer’s manual.
Note: This guide has no steps for printing a status or test report. Other 5xx/6xx models (e.g. 515, 530, 580, 615) were not checked against their own guides.
HP HP DeskJet 2700 All-in-One seriesDeskJet 2700 All-in-One seriesInkjet
Cleaning
- Load Letter or A4 unused plain white paper.
- Open the HP printer software (Windows), click Print & Scan, then Maintain Your Printer.
- On the Device Services tab, click Clean Cartridges and follow the prompts.
- Don't clean unless you need to; it wastes ink and shortens cartridge life.
Source: User Guide HP DeskJet 2700 All-in-One series - Fix print quality issues (h10032.www1.hp.com). Last checked .
Not listed here: nozzle check. We could not confirm these steps in an official source for this family, so check your printer’s manual.
Note: Only the DeskJet 2700 guide was checked. Other DeskJet / DeskJet Plus models (e.g. 4100, 2700e) may use different button combinations. The guide documents cleaning and alignment only through the Windows software.
HP HP ENVY 6000 All-in-One seriesENVY 6000 All-in-One seriesInkjet
Cleaning
- Load Letter or A4 unused plain white paper.
- Open the HP printer software (Windows), click Print & Scan, then Maintain Your Printer.
- On the Device Services tab, click Clean Cartridges and follow the prompts.
Source: User Guide HP ENVY 6000 All-in-One series - Fix print quality issues (h10032.www1.hp.com). Last checked .
Not listed here: nozzle check. We could not confirm these steps in an official source for this family, so check your printer’s manual.
Note: The control panel has no button for the Print Quality Report; the guide only documents the EWS and HP Smart paths. 6000e (HP+) models have a separate guide that was not checked.
HP HP OfficeJet Pro 8020 / 9010 / 9020 seriesOfficeJet Pro 8020 series, OfficeJet Pro 9010 series, OfficeJet Pro 9020 seriesInkjet
Cleaning
- Load Letter, A4, or Legal unused plain white paper.
- Swipe down to open the Dashboard and touch Setup.
- Touch Printer Maintenance > Clean Printhead and follow the on-screen instructions.
- Clean only when needed; cleaning uses ink and takes a few minutes.
Source: HP OfficeJet Pro 9010 series User Guide - Fix print quality issues / Maintain the printhead and cartridges (h10032.www1.hp.com). Last checked .
Not listed here: nozzle check. We could not confirm these steps in an official source for this family, so check your printer’s manual.
Note: Same menu wording in the OfficeJet Pro 8020 series User Guide (https://h10032.www1.hp.com/ctg/Manual/c06291141.pdf) and the 9020 series User Guide (https://h10032.www1.hp.com/ctg/Manual/c06220010.pdf). The guide says clean or align can also be run from the HP printer software or the EWS. The 'e' (HP+) variants have separate guides that were not checked.
HP HP LaserJet M109-M112 seriesLaserJet M109a, LaserJet M110w, LaserJet M110we, LaserJet M111a, LaserJet M111w, LaserJet M112aLaser
Cleaning
- Open the HP Embedded Web Server (EWS).
- Click the System tab, then click Service.
- In the Cartridge Cleaning Mode area, click Start.
Source: HP LaserJet M109-M112, M109a-M112a series User Guide - Print a cleaning page (h10032.www1.hp.com). Last checked .
Not listed here: nozzle check. We could not confirm these steps in an official source for this family, so check your printer’s manual.
Note: This series has no front-panel menu. HP's 'Print a cleaning page' procedure starts Cartridge Cleaning Mode from the EWS.
HP HP LaserJet MFP M139-M142 seriesLaserJet MFP M139w, LaserJet MFP M140w, LaserJet MFP M141a, LaserJet MFP M141wLaser
Cleaning
- Open the HP Embedded Web Server (EWS).
- Click the System tab, then click Service.
- In the Cartridge Cleaning Mode area, click Start.
Source: HP LaserJet MFP M139-M142 series User Guide - Print a cleaning page (h10032.www1.hp.com). Last checked .
Not listed here: nozzle check. We could not confirm these steps in an official source for this family, so check your printer’s manual.
HP HP LaserJet M207-M212 seriesLaserJet M207dw, LaserJet M208dw, LaserJet M209d, LaserJet M209dw, LaserJet M209dwe, LaserJet M211d, LaserJet M211dwLaser
Cleaning
- Open the Embedded Web Server (EWS).
- On the System tab, click Service.
- In the Fuser Cleaning mode area, click Start to print the cleaning page.
- For dust on the cartridge (background, dark bands, repeating horizontal bands), go to the same Service page and click Start under Cartridge Cleaning Mode.
Source: User Guide HP LaserJet M207-M212 series - Print a cleaning page / Clean the cartridge (h10032.www1.hp.com). Last checked .
Not listed here: nozzle check. We could not confirm these steps in an official source for this family, so check your printer’s manual.
HP HP LaserJet MFP M232-M237 seriesLaserJet MFP M232dw, LaserJet MFP M233dw, LaserJet MFP M233sdw, LaserJet MFP M234dw, LaserJet MFP M234dwe, LaserJet MFP M234sdn, LaserJet MFP M234sdw, LaserJet MFP M234sdweLaser
Cleaning
- Open the Embedded Web Server (EWS).
- On the System tab, click Service.
- In the Fuser Cleaning mode area, click Start to print the cleaning page.
- For a dusty cartridge, go to the same Service page and click Start under Cartridge Cleaning Mode.
Source: User Guide HP LaserJet MFP M232-M237 series - Print a cleaning page / Clean the cartridge (h10032.www1.hp.com). Last checked .
Not listed here: nozzle check. We could not confirm these steps in an official source for this family, so check your printer’s manual.
HP HP LaserJet Pro M304-M305, M404-M405LaserJet Pro M404, LaserJet Pro M405, LaserJet Pro M404d, LaserJet Pro M405d, LaserJet Pro M304, LaserJet Pro M305Laser
Cleaning
- Press OK to show the Home screen.
- Using the arrow and OK buttons, open Setup > Printer Maintenance > Print Quality Tools > Cleaning Page.
- When asked, load plain Letter or A4 paper and press OK.
- Wait for the cleaning to finish, then throw the printed page away.
Source: HP LaserJet Pro M304-M305, M404-M405 User Guide - Print a cleaning page (h10032.www1.hp.com). Last checked .
Not listed here: nozzle check. We could not confirm these steps in an official source for this family, so check your printer’s manual.
Note: The user guide has no Print Quality Report steps for this mono series, and its repair manual (kaas pdf_11503727) has no repeating-defect distance table.
HP HP Color LaserJet Pro M255-M256 / MFP M282-M285Color LaserJet Pro M255, Color LaserJet Pro M256, Color LaserJet Pro MFP M282, Color LaserJet Pro MFP M283, Color LaserJet Pro MFP M284, Color LaserJet Pro MFP M285Laser
Cleaning
- 2-line control panels: press OK. Touchscreen panels: swipe to the Setup menu and touch the Setup icon.
- Open Service > Cleaning Page.
- When asked, load plain Letter or A4 paper and select OK.
- Wait for the cleaning to finish, then throw the printed page away.
Source: HP Color LaserJet Pro M255-M256 User Guide - Print a cleaning page (h10032.www1.hp.com). Last checked .
Not listed here: nozzle check. We could not confirm these steps in an official source for this family, so check your printer’s manual.
Note: Laser 'alignment' here means HP's Color Calibration, which HP describes as aligning the colors. The MFP M282-M285 User Guide (https://h10032.www1.hp.com/ctg/Manual/c06431905.pdf) uses the same menus: Setup > Reports > Print Quality Page / Configuration Report; Setup > Service > Cleaning Page; Setup > System Setup > Print Quality > Color Calibration > Calibrate Now.
HP HP Color LaserJet Pro M454 / MFP M479Color LaserJet Pro M454dn, Color LaserJet Pro M454dw, Color LaserJet Pro M454nw, Color LaserJet Pro MFP M479fdw, Color LaserJet Pro MFP M479fdn, Color LaserJet Pro MFP M479dw, Color LaserJet Pro MFP M479fnwLaser
Cleaning
- Touchscreen: swipe the top tab down to open the Dashboard and touch Setup. 2-line LCD: press OK, arrow to Setup, press OK.
- Open Printer Maintenance > Print Quality Tools > Cleaning Page.
- When asked, load plain Letter or A4 paper and press or touch OK.
- Wait for the cleaning to finish, then throw the printed page away.
Source: HP Color LaserJet Pro M454 User Guide - Print a cleaning page (h10032.www1.hp.com). Last checked .
Not listed here: nozzle check. We could not confirm these steps in an official source for this family, so check your printer’s manual.
Note: The MFP M479 User Guide (https://kaas.hpcloud.hp.com/pdf-public/pdf_375412_en-US-1.pdf) gives the same touchscreen paths: Dashboard > Setup > Reports > Print Quality Report / Printer Configuration Report; Printer Maintenance > Print Quality Tools > Cleaning Page; Printer Maintenance > Color Calibration.
HP HP LaserJet Tank 1020 / 150x / 250x seriesLaserJet Tank 1020, LaserJet Tank 1020w, LaserJet Tank 1502w, LaserJet Tank 1504w, LaserJet Tank 2502dw, LaserJet Tank 2504dw, LaserJet Tank 2506dwLaser
Cleaning
- Open the Embedded Web Server (EWS).
- On the System tab, click Service.
- In the Fuser Cleaning mode area, click Start.
Source: HP LaserJet Tank 1020, 150x, 250x series User Guide - Print a cleaning page (kaas.hpcloud.hp.com). Last checked .
Not listed here: nozzle check. We could not confirm these steps in an official source for this family, so check your printer’s manual.
Note: Neverstop models were not checked.
How to unclog a printer head, in order
- Check the ink. An empty tank, a closed transport valve or an unseated cartridge looks exactly like a clog.
- Print a nozzle check and note which colors have gaps.
- Run one cleaning from the printer menu or utility, then check again.
- Repeat only up to your manual’s limit. Use the advisor above to keep count.
- Rest the printer. Turn it off with its power button and leave it for the time your manual gives, often overnight.
- Check again, then print one purge sheet for the stubborn color.
- Try the stronger cycle (Power Cleaning on Epson, Deep Cleaning on Canon, Strong or Special cleaning on Brother) only if your manual suggests it, because it uses much more ink.
Why is my printer head clogged?
Ink dries in the nozzles when a printer sits unused, especially in warm, dry rooms. Unplugging the printer at the wall instead of switching it off can leave the head uncapped. Refilling with a different ink, or running a tank very low so air gets in, causes the same symptoms.
Questions people ask
How many times should I clean my print head?
Only as many as your manual allows, then stop. Epson’s guides we checked set a limit of three or four cleanings before leaving the printer off for 6 to 12 hours, depending on model. Canon’s say to deep clean after two normal cleanings and then wait 24 hours if needed.
Why does cleaning sometimes make it worse?
Each cycle pushes ink through the head and into the waste pad. Running many in a row uses a lot of ink and can draw air into the lines, which looks like a worse clog. Resting the printer lets ink soften dried nozzles on its own.
What is a printer cleaning page?
A sheet with large solid areas of one or more colors. Printing it pulls fresh ink through the nozzles in normal use, which can clear light clogs without running a full cleaning cycle. Our purge sheets do this per color.
How do I stop my printer ink drying out?
Print something small every week, keep the printer switched off with its own power button (so the head is capped), and keep it out of direct heat. The maintenance strip on this page and its calendar reminder help with the first part.
Can I unclog a print head by hand?
Some people soak or flush heads with cleaning fluid, but it can void a warranty and damage fixed heads. Try the built-in cleaning, rest overnight and a purge sheet first. Follow your manual before opening anything.