Brother Printer Test Page
Print our test page to check a Brother printer’s output, then print Brother’s own Printer Settings report or, on inkjets, the Check Print Quality sheet. Laser owners with spots repeating every 94 mm should look at the drum. Find your model below for the steps from Brother’s online user’s guides.
By Online Printer Test PageLast updated
Printed? How did it look?
- Scale: 100% or Actual size, not Fit to page
- Headers and footers: off
- Paper in the tray matches US Letter
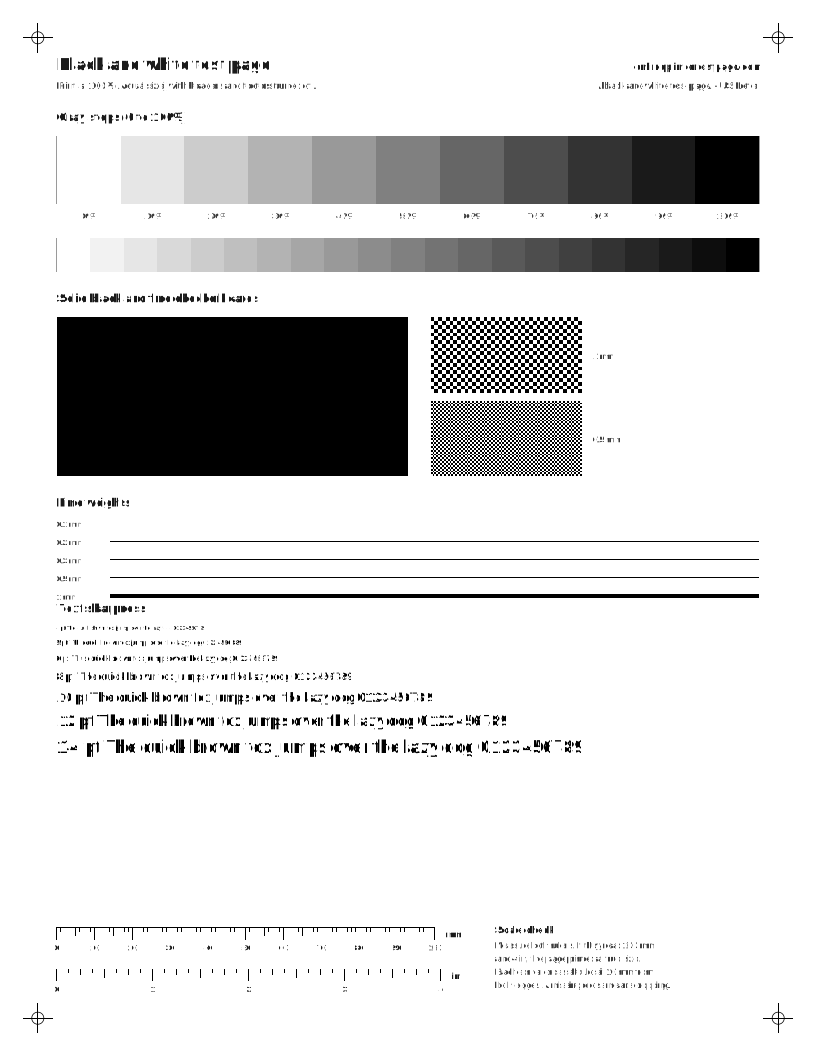
What to look for: black and white test page
- The solid black block should be even, with no white lines or streaks.
- You should be able to tell every gray step apart. Steps that merge at the dark end mean heavy ink or toner.
- Small text should be sharp, not fuzzy or doubled.
What to look for: color test page
- Each C, M, Y and K row should step evenly from solid to pale. A missing or streaky row points to that ink.
- The gray ramp should look neutral. A pink, green or blue cast means one color is printing weak or strong.
- The spectrum should flow without hard bands or gaps.
What to look for: laser uniformity page
- Vertical light streaks in every field usually mean low toner or a dirty part along the paper path.
- Dark lines or specks that repeat down the page come from a roller. Measure the gap on the repeat-defect page.
What to look for: repeat-defect measuring page
- Find a mark that repeats down the page.
- Use the side scale to measure from one mark to the next, then enter the distance in the repeat-defect ruler.
What to look for: nozzle check grid
- Every step of each staircase should be complete. A missing step or broken line points to that ink.
- Thin white lines across a solid block are the classic clogged-nozzle sign.
- For a nozzle-by-nozzle reading, also run your printer’s own nozzle check.
Find your Brother model
Steps are summarized from each maker’s own manuals and support pages, with a link to the source and the date we last checked it. If your model is missing, the closest family usually uses the same menus, but confirm in your manual.
9 model families
HL-L2300 series mono laser (HL-L2325DW/HL-L2350DW/HL-L2370DW)HL-L2325DW, HL-L2350DW, HL-L2370DW, HL-L2370DWXL, HL-L2379DWLaser
Print a test or status page
- Press ▲ or ▼ to show [Print Reports], then press OK.
- Press ▲ or ▼ to show [Printer Settings], then press OK.
- Press Go. The machine prints the Printer Settings report.
Source: Print a List of Printer Settings (support.brother.com). Last checked .
Print quality report
- Press ▲ or ▼ to show [Printer], then press OK.
- (HL-L2370DW/HL-L2370DWXL/HL-L2379DW only) Press ▲ or ▼ to show [Print Options], then press OK.
- Press ▲ or ▼ to show [Test Print], then press Go.
- The machine prints the test page.
Source: Test Print (Online User's Guide HL-L2325DW/HL-L2350DW/HL-L2370DW/HL-L2370DWXL/HL-L2379DW) (support.brother.com). Last checked .
Cleaning
- Drum Dot Print (for dots or repeating marks at 94 mm / 3.7 in.): make sure the machine is in Ready mode.
- Press ▲ or ▼ to show [Print Reports] and press OK, select [Drum Dot Print], then press Go to print the Drum Dot Check Sheet.
- Press and hold the power button to turn the machine off, open the front cover and remove the toner cartridge and drum unit assembly.
- Push down the green lock lever and take the toner cartridge out of the drum unit.
- Turn the drum unit so the drum gear is on the left; use the numbered markers next to the drum roller to match the dot column on the check sheet.
- Turn the drum by the wheel on the end (do not touch the drum surface) and wipe the mark gently with a dry cotton swab. No sharp objects or liquids.
- Push the toner cartridge back into the drum unit until it locks, reinstall the assembly, close the front cover and turn the machine on.
Source: Clean the Drum Unit Using Drum Dot Print (support.brother.com). Last checked .
Not listed here: nozzle check, alignment. We could not confirm these steps in an official source for this family, so check your printer’s manual.
Note: No print alignment procedure exists for these mono lasers. testPage = Printer Settings report; qualityReport = Test Print (Brother: 'If you have a print quality problem, print a test page first'). Corona wire cleaning (if print quality problems or [Drum !] shows): open front cover, remove toner/drum assembly, gently slide the green tab left-right several times, return it to Home (▲) so the arrows align (otherwise vertical stripe), reinstall: https://support.brother.com/g/s/id/htmldoc/printer/cv_hll2310d/use/html/GUID-F406D846-93AB-4C32-ABE0-C31497BAAAE0_146.html.
HL-L2400 series mono laser (HL-L2400D/HL-L2460DW)HL-L2400D, HL-L2405W, HL-L2420DW, HL-L2460DW, HL-L2460DWXL, HL-L2865DWLaser
Print a test or status page
- HL-L2400D (no LCD): close the front cover, plug in the power cord, press the power button and make sure only the Ready LED is lit.
- HL-L2400D: press Go three (3) times. The machine prints the Printer Settings.
- LCD models: press ▲ or ▼ to show [Print Reports], then press OK.
- LCD models: press ▲ or ▼ to show [Printer Settings], then press OK.
- LCD models: press Go. The machine prints the Printer Settings.
Source: Print a List of Printer Settings (support.brother.com). Last checked .
Print quality report
- (LCD models HL-L2405W/HL-L2420DW/HL-L2460DW/HL-L2460DWXL/HL-L2865DW) Press ▲ or ▼ to show [Printer], then press OK.
- (HL-L2460DW/HL-L2460DWXL/HL-L2865DW only) Press ▲ or ▼ to show [Print Options], then press OK.
- Press ▲ or ▼ to show [Test Print], then press OK.
- Press Go. The machine prints the test page.
Source: Test Print (Online User's Guide HL-L2400D/HL-L2405W/HL-L2420DW/HL-L2460DW/HL-L2460DWXL/HL-L2865DW) (support.brother.com). Last checked .
Cleaning
- Drum Dot Print (for dots/marks repeating at 94 mm / 3.7 in.): make sure the machine is in Ready mode.
- HL-L2400D: press Go eight (8) times to print the Drum Dot Check Sheet.
- LCD models: press ▲ or ▼ to show [Print Reports] and press OK, select [Drum Dot Print] and press OK, then press Go to print the Drum Dot Check Sheet; press Back twice.
- Press and hold the power button to turn the machine off, open the front cover and remove the toner cartridge and drum unit assembly.
- Push down the green lock lever and take the toner cartridge out of the drum unit.
- Turn the drum unit so the drum gear is on the left; use the numbered markers next to the drum roller to match the dot column on the check sheet.
- Rotate the drum by the end wheel only (do not touch the drum surface) and wipe the mark gently with a dry cotton swab. Do not use sharp objects or liquids.
- Push the toner cartridge back into the drum unit until it locks, reinstall the assembly, close the front cover and turn the machine on.
Source: Clean the Drum Unit (support.brother.com). Last checked .
Not listed here: nozzle check, alignment. We could not confirm these steps in an official source for this family, so check your printer’s manual.
Note: No-screen HL-L2400D button combos (exact, from Brother's guide): Go x3 = Printer Settings page; Go x8 = Drum Dot Check Sheet. The Test Print page lists only the LCD models (HL-L2405W/L2420DW/L2460DW/L2460DWXL/L2865DW); no Go-button test print for HL-L2400D was found. Corona wire cleaning (slide green tab left/right several times, return it to Home ▲): https://support.brother.com/g/s/id/htmldoc/printer/cv_hll2460dw/use/html/GUID-F406D846-93AB-4C32-ABE0-C31497BAAAE0_1.html. No print alignment procedure (mono laser).
MFC/DCP-L2700 series mono laser all-in-one (MFC-L2710DW/MFC-L2750DW)MFC-L2710DW, MFC-L2717DW, MFC-L2730DW, MFC-L2750DW, MFC-L2750DWXL, MFC-L2759DW, MFC-L2690DW, MFC-L2690DWXLLaser
Print a test or status page
- 2-line LCD models: press Menu, press ▲ or ▼ to show [Print Reports] and press OK.
- Press ▲ or ▼ to show the report you want (e.g. Printer Settings) and press OK, then press Start; press Stop/Exit.
- Touchscreen models: press [Settings] > [All Settings] > [Print Reports].
- Press ▲ or ▼ to show the report you want and press it, then press [Yes]; press the Home icon.
Source: Print a Report (support.brother.com). Last checked .
Print quality report
- 2-line LCD models (HL-L2390DW/MFC-L2690DW/MFC-L2690DWXL/MFC-L2710DW/MFC-L2717DW): press Menu.
- Press ▲ or ▼ to show [Printer], then press OK.
- Press ▲ or ▼ to show [Print Options], then press OK.
- Select [Test Print], then press OK.
- Press Start to print the Test Print page, then press Stop/Exit.
- Touchscreen models (HL-L2395DW/MFC-L2730DW/MFC-L2750DW/MFC-L2750DWXL/MFC-L2759DW): press [Settings] > [All Settings] > [Printer] > [Print Options] > [Test Print].
- Press [Yes], then press the Home icon.
Source: Test Print (Online User's Guide HL-L2390DW/DCP-L2550DW/HL-L2395DW/MFC-L2690DW/MFC-L2710DW/MFC-L2717DW/MFC-L2730DW/MFC-L2750DW/MFC-L2759DW) (support.brother.com). Last checked .
Cleaning
- Drum Dot Print (for marks repeating at 94 mm / 3.7 in.): make sure the machine is in Ready mode.
- 2-line LCD models: press ▲ or ▼ to show [Print Reports] and press OK, select [Drum Dot Print], then press Start.
- Touchscreen models: press [Settings] > [All Settings] > [Print Reports] > [Drum Dot Print], press [Yes], then press the Home icon.
- Press and hold the power button to turn off the machine, open the front cover and remove the toner cartridge and drum unit assembly.
- Push down the green lock lever and take the toner cartridge out of the drum unit.
- Turn the drum unit so the drum gear is on the left; use the numbered markers next to the drum roller to locate the mark matching the check sheet column.
- Turn the drum by its end wheel (do not touch the surface) and gently wipe the mark with a dry cotton swab. No sharp objects or liquids.
- Push the toner cartridge back in until it locks, reinstall the assembly, close the front cover and turn the machine on.
Source: Clean the Drum Unit Using Drum Dot Print (support.brother.com). Last checked .
Not listed here: nozzle check, alignment. We could not confirm these steps in an official source for this family, so check your printer’s manual.
Note: Brother's Reports page for this guide lists Printer Settings (current printer settings), User Settings, Network Configuration, Drum Dot Print, WLAN Report and fax reports: https://support.brother.com/g/s/id/htmldoc/mfc/cv_mfcl2750dw/use/html/GUID-87ACF115-CEEF-447D-9374-4DCC579DBBB7_427.html. Corona wire cleaning (green tab, return to Home ▲): https://support.brother.com/g/s/id/htmldoc/mfc/cv_mfcl2750dw/use/html/GUID-F406D846-93AB-4C32-ABE0-C31497BAAAE0_394.html. No print alignment procedure (mono laser).
HL-L3200 series color LED printer (HL-L3270CDW)HL-L3210CW, HL-L3230CDN, HL-L3230CDW, HL-L3270CDWLaser
Print quality report
- HL-L3210CW/HL-L3230CDN/HL-L3230CDW: press ▲ or ▼ to show [Printer] and press OK; then [Print Options] and press OK.
- Press ▲ or ▼ to show [Test Print] and press OK, then press Go.
- HL-L3270CDW (touchscreen): press [Settings] > [All Settings] > [Printer] > [Print Options] > [Test Print].
- Press [Yes], then press the Home icon.
Source: Test Print (Online User's Guide HL-L3210CW/HL-L3230CDN/HL-L3230CDW/HL-L3270CDW) (support.brother.com). Last checked .
Cleaning
- Drum Dot Print (for black/white dots or marks repeating at 94 mm / 3.7 in.): make sure the machine is in Ready Mode.
- HL-L3210CW/HL-L3230CDN/HL-L3230CDW: press ▲ or ▼ to show [Print Reports] and press OK, select [Drum Dot Print] and press OK, then press Go.
- HL-L3270CDW: press [Settings] > [All Settings] > [Print Reports] > [Drum Dot Print], then press [Yes].
- Press and hold the power button to turn off the machine and open the top cover until it locks open.
- The dot colour on the Drum Dot Check Sheet tells you which drum to clean; remove that colour's toner cartridge and drum unit assembly.
- Push down the green lock lever and remove the toner cartridge from the drum unit. Touch only the drum unit gear.
- Lift the drum frame by the handle, rotate it counterclockwise, find the drum gear on the right side, and tilt the frame so the numbered grid is visible.
- Rotate the drum by the gear, use the column numbers to locate the mark, and wipe it gently with a dry cotton swab. No sharp objects or liquids.
- Reinsert the toner into the drum unit until it locks, slide the assembly back into the matching colour slot, close the top cover and turn the machine on.
Source: Clean the Drum Unit (support.brother.com). Last checked .
Alignment
- HL-L3210CW/HL-L3230CDN/HL-L3230CDW: press ▲ or ▼ to select [Printer] and press OK.
- Press ▲ or ▼ to show [Color Correction] and press OK, then [Registration] and press OK.
- Press ▲ to select [Yes]; registration runs automatically (about 10 seconds or more). Press Cancel.
- HL-L3270CDW: press the [Toner] icon > [Registration], press [Yes], then press the Home icon.
Source: Correct Color Print Alignment (Color Registration) (support.brother.com). Last checked .
Not listed here: print a test or status page, nozzle check. We could not confirm these steps in an official source for this family, so check your printer’s manual.
Note: testPage omitted: no step page for the Printer Settings report was found in this guide (Test Print is recorded as qualityReport). Alignment = Brother's Color Registration (use when solid areas show cyan, magenta or yellow fringes). Related: Calibrate Color Output (Printer > Color Correction > Calibration > Calibrate on LCD models; Toner > Calibration > Calibrate on HL-L3270CDW; takes a few minutes): https://support.brother.com/g/s/id/htmldoc/printer/cv_hll3210cw/use/html/GUID-57B9BD74-B65D-44AA-AAC8-2A8E65D6C09F_200.html. Clean LED heads (power off, open top cover, wipe each LED head window with a dry, soft, lint-free cloth): https://support.brother.com/g/s/id/htmldoc/printer/cv_hll3210cw/use/html/GUID-DBF662AB-0E29-4373-BA29-D0575E121BB5_195.html. Corona wires (slide green tab on each drum, return to Home ▲): https://support.brother.com/g/s/id/htmldoc/printer/cv_hll3210cw/use/html/GUID-F0972AB4-CC3A-46B9-BB0C-F7039035A842_197.html.
MFC-L3700 series color LED all-in-one (MFC-L3770CDW)MFC-L3710CW, MFC-L3750CDW, MFC-L3770CDW, HL-L3290CDW, DCP-L3551CDWLaser
Print a test or status page
- HL-L3290CDW/DCP-L3551CDW: press Menu, press ▲ or ▼ to show [Print Reports] and press OK, choose the report and press OK, then press Black Start or Color Start; press Stop/Exit.
- MFC models: press [Settings] > [All Settings] > [Print Reports].
- Swipe or press ▲ or ▼ to show the report you want and press it, then press [Yes]; press the Home icon.
Source: Print a Report (support.brother.com). Last checked .
Print quality report
- HL-L3290CDW/DCP-L3551CDW: press Menu, press ▲ or ▼ to show [Printer] and press OK (and [Print Options] on printer-emulation models).
- Press ▲ or ▼ to show [Test Print] and press OK, then press Black Start or Color Start; press Stop/Exit.
- MFC-L3710CW/MFC-L3750CDW/MFC-L3770CDW: press [Settings] > [All Settings] > [Printer] > [Print Options] > [Test Print].
- Press [Yes], then press the Home icon.
Source: Test Print (Online User's Guide HL-L3290CDW/DCP-L3551CDW/MFC-L3710CW/MFC-L3750CDW/MFC-L3770CDW) (support.brother.com). Last checked .
Cleaning
- Drum Dot Print (for black/white dots or marks repeating at 94 mm / 3.7 in.): make sure the machine is in Ready Mode.
- HL-L3290CDW/DCP-L3551CDW: press Menu, select [Print Reports] (OK), then [Drum Dot Print] (OK).
- MFC models: press [Settings] > [All Settings] > [Print Reports] > [Drum Dot Print], then press [Yes].
- Press and hold the power button to turn off the machine and open the top cover until it locks open.
- The dot colour on the Drum Dot Check Sheet shows which drum to clean; remove that colour's toner cartridge and drum unit assembly.
- Push down the green lock lever and remove the toner cartridge. Touch only the drum unit gear.
- Lift the drum frame by the handle, rotate it counterclockwise, locate the drum gear inside the right side, and tilt the frame so the numbered grid is visible.
- Rotate the drum by the gear, use the column numbers to find the mark, and wipe it gently with a dry cotton swab. No sharp objects or liquids.
- Reinsert the toner until it locks, slide the assembly into the matching colour slot, close the top cover and turn the machine on.
Source: Clean the Drum Unit (support.brother.com). Last checked .
Alignment
- HL-L3290CDW/DCP-L3551CDW: press Menu, select [Printer] (OK), [Clr Correction] (OK), [Registration] (OK).
- Press ▲ to select [Yes]; registration runs automatically (about 10 seconds or more). Press Stop/Exit.
- MFC-L3710CW/MFC-L3750CDW/MFC-L3770CDW: press the [Toner] icon > [Registration], press [Yes], then press the Home icon.
Source: Correct Color Print Alignment (Color Registration) (support.brother.com). Last checked .
Not listed here: nozzle check. We could not confirm these steps in an official source for this family, so check your printer’s manual.
Note: testPage = Print Reports (choose Printer Settings or another report); qualityReport = Test Print. Alignment = Color Registration. Related: Calibrate Color Output (Menu > Printer > Clr Correction > Calibration > Calibrate on LCD models; Toner > Calibration > Calibrate on MFC models; takes a few minutes): https://support.brother.com/g/s/id/htmldoc/mfc/cv_hll3290cdw/use/html/GUID-57B9BD74-B65D-44AA-AAC8-2A8E65D6C09F_404.html. Clean LED heads: https://support.brother.com/g/s/id/htmldoc/mfc/cv_hll3290cdw/use/html/GUID-DBF662AB-0E29-4373-BA29-D0575E121BB5_399.html. Corona wires: https://support.brother.com/g/s/id/htmldoc/mfc/cv_hll3290cdw/use/html/GUID-F0972AB4-CC3A-46B9-BB0C-F7039035A842_401.html.
MFC-J1010DW / MFC-J1170DW inkjet all-in-oneMFC-J1010DW, MFC-J1012DW, MFC-J1170DWInkjet
Print a test or status page
- MFC-J1010DW/MFC-J1012DW: press Settings.
- Press ▲ or ▼ to select [Print Reports] and press OK, select the report you want (e.g. User Settings) and press OK.
- Press ►, then press Stop/Exit.
- MFC-J1170DW: press [Settings] > [All Settings] > [Print Reports], press the report you want, press [Yes], then press the Home icon.
Source: Print a Report (support.brother.com). Last checked .
Print quality report
- MFC-J1010DW/MFC-J1012DW: press the Ink button.
- Press ▲ or ▼ to select [Impr. PrintQuality] and press OK, then select [Impr. PrintQuality] again and press OK.
- Press ► to print the check sheet, and check the four colour blocks.
- If all lines are clear, press ◄ to select [No] to finish. If lines are missing, press ► to select [Yes].
- For each colour, press ◄ or ► to pick the pattern (1-4) closest to the printout and press OK.
- If cleaning is needed, press ► to start it; afterwards press ► [Yes] and ► again to reprint and recheck the sheet.
- MFC-J1170DW: press [Ink] > [Improve Print Quality] > [Check Print Quality], then [Start]; answer [No]/[Yes] and pick patterns 1-4 on the touchscreen; press [Start] to clean if prompted.
Source: Check the Print Quality (support.brother.com). Last checked .
Nozzle check (Brother calls it Print Quality Check)
- MFC-J1010DW/MFC-J1012DW: press the Ink button.
- Press ▲ or ▼ to select [Impr. PrintQuality] and press OK, then select [Impr. PrintQuality] again and press OK.
- Press ► to print the check sheet, and check the four colour blocks.
- If all lines are clear, press ◄ to select [No] to finish. If lines are missing, press ► to select [Yes].
- For each colour, press ◄ or ► to pick the pattern (1-4) closest to the printout and press OK.
- If cleaning is needed, press ► to start it; afterwards press ► [Yes] and ► again to reprint and recheck the sheet.
- MFC-J1170DW: press [Ink] > [Improve Print Quality] > [Check Print Quality], then [Start]; answer [No]/[Yes] and pick patterns 1-4 on the touchscreen; press [Start] to clean if prompted.
Source: Check the Print Quality (support.brother.com). Last checked .
Cleaning
- MFC-J1010DW/MFC-J1012DW: press the Ink button.
- Press ▲ or ▼ to select [Print Head Cleaning] and press OK.
- Select [Black only], [Color only] or [All] and press OK.
- Select [Normal], [Strong] or [Strongest] and press OK.
- Press ►. The machine cleans the print head.
- MFC-J1170DW: press [Ink] > [Print Head Cleaning], choose [Black only]/[Color only]/[All], then [Normal]/[Strong]/[Strongest], and press [Start].
- If quality has not improved, repeat; if it still does not improve after several repeats, contact Brother Customer Service.
Source: Clean the Print Head from Your Brother Machine (support.brother.com). Last checked .
Alignment
- Run Check the Print Quality first.
- MFC-J1010DW/MFC-J1012DW: press the Ink button, select [Impr. PrintQuality] (OK), then [Alignment] (OK).
- Press ► when asked whether a print quality check has been completed.
- Select [Auto] (the machine scans the check sheet) or [Manual] (you enter values from the sheet); for Auto choose the paper size.
- Load that paper size and press ► to print the check sheet, then follow the LCD instructions.
- MFC-J1170DW: press [Ink] > [Improve Print Quality] > [Alignment] > [Next] > [Yes], choose [Auto] or [Manual], load paper and press [Start].
Source: Check the Print Alignment from Your Brother Machine (support.brother.com). Last checked .
Note: Brother has no separate 'nozzle check'; its Print Quality Check sheet (Check the Print Quality) contains the nozzle check pattern, so nozzleCheck maps to the same procedure. No Test Print exists on these inkjets; testPage maps to Print Reports (Brother's Reports page lists User Settings, Network Configuration, WLAN Report, fax reports: https://support.brother.com/g/s/id/htmldoc/mfc/cv_mfc1010dw/use/html/GUID-E0E33870-A13E-4BA6-8A91-1B8205912BC0_1.html). Brother warns: do not touch the print head; cleaning uses ink and cleaning too often wastes ink.
MFC-J4335DW / MFC-J4535DW inkjet all-in-oneMFC-J4335DW, MFC-J4345DW, MFC-J4535DWInkjet
Print a test or status page
- MFC-J4335DW/MFC-J4345DW: press Settings.
- Press ▲ or ▼ to select [Print Reports] and press OK, select the report you want and press OK.
- Press ►, then press Stop/Exit.
- MFC-J4535DW: press [Settings] > [All Settings] > [Print Reports], press the report you want, press [Yes], then press the Home icon.
Source: Print a Report (support.brother.com). Last checked .
Print quality report
- MFC-J4335DW/MFC-J4345DW: press the Ink button.
- Press ▲ or ▼ to select [Impr. PrintQuality] and press OK, then select [Impr. PrintQuality] again and press OK.
- Press ► to print the check sheet, and check the four colour blocks.
- If all lines are clear, press ◄ to select [No] to finish. If lines are missing, press ► to select [Yes].
- For each colour, press ◄ or ► to pick the pattern (1-4) closest to the printout and press OK.
- If cleaning is needed, press ► to start it; afterwards press ► [Yes] and ► again to reprint and recheck.
- MFC-J4535DW: press [Ink] > [Improve Print Quality] > [Check Print Quality], then [Start]; answer on the touchscreen and press [Start] to clean if prompted.
Source: Check the Print Quality (support.brother.com). Last checked .
Nozzle check (Brother calls it Print Quality Check)
- MFC-J4335DW/MFC-J4345DW: press the Ink button.
- Press ▲ or ▼ to select [Impr. PrintQuality] and press OK, then select [Impr. PrintQuality] again and press OK.
- Press ► to print the check sheet, and check the four colour blocks.
- If all lines are clear, press ◄ to select [No] to finish. If lines are missing, press ► to select [Yes].
- For each colour, press ◄ or ► to pick the pattern (1-4) closest to the printout and press OK.
- If cleaning is needed, press ► to start it; afterwards press ► [Yes] and ► again to reprint and recheck.
- MFC-J4535DW: press [Ink] > [Improve Print Quality] > [Check Print Quality], then [Start]; answer on the touchscreen and press [Start] to clean if prompted.
Source: Check the Print Quality (support.brother.com). Last checked .
Cleaning
- MFC-J4335DW/MFC-J4345DW: press the Ink button.
- Press ▲ or ▼ to select [Print Head Cleaning] and press OK.
- Select [Black only], [Color only] or [All] and press OK, then [Normal], [Strong] or [Strongest] and press OK.
- Press ►. The machine cleans the print head.
- Special cleaning (only after several normal cleanings did not help; uses the most ink): press the Ink button, select [Print Head Cleaning] and press OK, then press Settings and OK at the same time.
- MFC-J4535DW: press [Ink] > [Print Head Cleaning], choose [Black only]/[Color only]/[All] and [Normal]/[Strong]/[Strongest], press [Start]. Special cleaning: [Ink] > [Print Head Cleaning], then press the X (cancel) icon for five seconds.
Source: Clean the Print Head from Your Brother Machine (support.brother.com). Last checked .
Alignment
- Run Check the Print Quality first.
- MFC-J4335DW/MFC-J4345DW: press the Ink button, select [Impr. PrintQuality] (OK), then [Alignment] (OK); press ► at the confirmation.
- Select [Auto] (machine scans the sheet) or [Manual] (enter values yourself); for Auto choose the paper size.
- Load that paper size and press ► to print the check sheet, then follow the LCD instructions.
- MFC-J4535DW: press [Ink] > [Improve Print Quality] > [Alignment] > [Next] > [Yes], choose [Auto] or [Manual], load paper and press [Start].
Source: Check the Print Alignment from Your Brother Machine (support.brother.com). Last checked .
Note: nozzleCheck maps to Brother's Check the Print Quality (Print Quality Check sheet with nozzle check pattern). testPage maps to Print Reports (no Test Print on inkjets; User Settings report lists current settings). The X icon used for MFC-J4535DW special cleaning was identified from the guide's icon image (red X).
MFC-J5855DW / MFC-J5955DW inkjet all-in-one (11x17)MFC-J5855DW, MFC-J5955DW, MFC-J5340DWInkjet
Print a test or status page
- Press [Settings] > [All Settings] > [Print Reports].
- Press ▲ or ▼ to show the report options and press the one you want.
- Press [Yes], then press the Home icon.
Source: Print a Report (support.brother.com). Last checked .
Print quality report
- Press [Ink] > [Improve Print Quality] > [Check Print Quality].
- Press [Start] to print the check sheet, and check the four colour blocks.
- If all lines are clear, press [No], then the Home icon. If lines are missing, press [Yes].
- For each colour, press the number of the pattern (1-4) that best matches the printout.
- If cleaning is needed, press [Start]; afterwards press [Yes] and [Start] to reprint and recheck the sheet.
Source: Check the Print Quality (support.brother.com). Last checked .
Nozzle check (Brother calls it Print Quality Check)
- Press [Ink] > [Improve Print Quality] > [Check Print Quality].
- Press [Start] to print the check sheet, and check the four colour blocks.
- If all lines are clear, press [No], then the Home icon. If lines are missing, press [Yes].
- For each colour, press the number of the pattern (1-4) that best matches the printout.
- If cleaning is needed, press [Start]; afterwards press [Yes] and [Start] to reprint and recheck the sheet.
Source: Check the Print Quality (support.brother.com). Last checked .
Cleaning
- Press [Ink] > [Print Head Cleaning].
- Press [Start]. The machine cleans the print head.
- Special cleaning (only if several cleanings did not help; uses the most ink): press [Ink] > [Print Head Cleaning], then press the X (cancel) icon for five seconds.
Source: Clean the Print Head from Your Brother Machine (support.brother.com). Last checked .
Alignment
- Run Check the Print Quality first ([Ink] > [Improve Print Quality] > [Check Print Quality]).
- Press [Ink] > [Improve Print Quality] > [Alignment], then [Next].
- Press [Yes] at the confirmation that a print quality check has been completed.
- Press [Auto] or [Manual]; select the paper size (Manual also asks for [Basic alignment] or [Advanced alignment]).
- Load that paper size, press [Start] to print the check sheet and follow the LCD instructions.
Source: Check the Print Alignment from Your Brother Machine (support.brother.com). Last checked .
Note: The US guide page for this model group shows a single cleaning flow ([Ink] > [Print Head Cleaning] > [Start]) without the Normal/Strong/Strongest choice. These models also have [Ink] > [Print Quality Auto Check] (default On) which detects clogged nozzles and cleans automatically: https://support.brother.com/g/s/id/htmldoc/mfc/cv_mfc5955dw/use/html/GUID-BAFB07B9-4408-42EA-ACD8-BBA52BB4D0A2_1.html. nozzleCheck maps to Check the Print Quality.
INKvestment Tank MFC-J995DW / MFC-J805DW / MFC-J815DWMFC-J995DW, MFC-J995DWXL, MFC-J805DW, MFC-J815DWInkjet
Print a test or status page
- MFC-J995DW: press [Settings] > [All Settings] > [Print Reports].
- Press ▲ or ▼ to show the report options and press the one you want, press [Yes], then the Home icon.
- MFC-J805DW/MFC-J815DW: press Settings, select [Print Reports] (OK), select the report (OK), press ►, then Stop/Exit.
Source: Print a Report (support.brother.com). Last checked .
Print quality report
- MFC-J995DW: press [Settings] > [Maintenance] > [Improve Print Quality] > [Check Print Quality].
- Press [Start] to print the Print Quality Check Sheet, and check the four colour blocks.
- If all lines are clear, press [No], then the Home icon. If lines are missing, press [Yes].
- For each colour, press the number of the pattern (1-4) that best matches the printout.
- If cleaning is needed, press [Start]; afterwards press [Yes] and [Start] to reprint and recheck.
- MFC-J805DW/MFC-J815DW: press Settings, then ▲/▼ to select [General Setup] > [Maintenance] > [Impr. PrintQuality] > [Impr. PrintQuality] (OK each), press ► to print, and answer with ◄/► as prompted.
Source: Check the Print Quality (support.brother.com). Last checked .
Nozzle check (Brother calls it Print Quality Check)
- MFC-J995DW: press [Settings] > [Maintenance] > [Improve Print Quality] > [Check Print Quality].
- Press [Start] to print the Print Quality Check Sheet, and check the four colour blocks.
- If all lines are clear, press [No], then the Home icon. If lines are missing, press [Yes].
- For each colour, press the number of the pattern (1-4) that best matches the printout.
- If cleaning is needed, press [Start]; afterwards press [Yes] and [Start] to reprint and recheck.
- MFC-J805DW/MFC-J815DW: press Settings, then ▲/▼ to select [General Setup] > [Maintenance] > [Impr. PrintQuality] > [Impr. PrintQuality] (OK each), press ► to print, and answer with ◄/► as prompted.
Source: Check the Print Quality (support.brother.com). Last checked .
Cleaning
- MFC-J995DW: press [Settings] > [Maintenance] > [Print Head Cleaning].
- Press [Black only], [Color only] or [All], then [Normal], [Strong] or [Strongest].
- Press [Start]. The machine cleans the print head.
- MFC-J805DW/MFC-J815DW: press Settings, select [General Setup] > [Maintenance] > [Print Head Cleaning] > Black only/Color only/All > Normal/Strong/Strongest (OK each), then press ►.
- If print has not improved, install a new genuine cartridge for each problem colour and clean again; if still not improved, contact Brother Customer Service.
Source: Clean the Print Head from Your Brother Machine (support.brother.com). Last checked .
Alignment
- MFC-J995DW: run the print quality check first, then press [Settings] > [Maintenance] > [Improve Print Quality] > [Alignment], then [Next] and [Yes].
- Press [Auto] or [Manual]; for Auto choose the paper size, load it and press [Start] to print the Alignment Check Sheet; follow the LCD.
- MFC-J805DW/MFC-J815DW: press Settings, select [General Setup] > [Maintenance] > [Impr. PrintQuality] > [Alignment] (OK each) and follow the LCD to print the Alignment Check Sheet.
- For each pattern, press ◄ or ► to pick the test print (1-9) with the fewest visible vertical stripes and press OK; repeat for all patterns, then press Stop/Exit.
Source: Check the Print Alignment from Your Brother Machine (support.brother.com). Last checked .
Note: Brother USA markets the MFC-J995DW as 'INKvestment Tank Color Inkjet All-in-One Printer' (https://www.brother-usa.com/products/mfcj995dw, now discontinued). On these models Print Quality / Cleaning live under Settings > Maintenance rather than an Ink button. nozzleCheck maps to Check the Print Quality (Print Quality Check Sheet).
How do I print a Brother printer settings page?
Brother calls its built-in page the Printer Settings or User Settings report, printed from the Print Reports menu. It confirms the printer works and lists the network address. Models without a screen use the Go button; your model’s steps are in the list above.
Brother print quality check and laser test print
On inkjets, the Check Print Quality sheet is Brother’s nozzle check. On lasers, the Printer Settings page and a test print show toner problems, and the Drum Dot Print page helps find marks caused by the drum.
Repeating marks on Brother lasers
- 94 mm: Drum unit (foreign material such as label glue on the drum, or a damaged drum). Clean the drum; replace it if marks remain. Color: HL-L3210CW, HL-L3230CDW, HL-L3270CDW, HL-L3290CDW, MFC-L3710CW, MFC-L3750CDW, MFC-L3770CDW, HL-L8260CDW, HL-L8360CDW, MFC-L8900CDW and others listed on the FAQ.
- 29 mm: Toner cartridge. Identify the color and install a new toner cartridge. Same color models as above.
- 94 mm: Drum unit (white spots on black, or black spots, every 94 mm). Print 10 to 15 blank pages, then clean the drum; replace it if marks remain. Mono: HL-L2350DW, HL-L2370DW, HL-L2460DW, HL-L2390DW, HL-L2395DW, DCP-L2550DW, MFC-L2710DW, MFC-L2717DW, MFC-L2730DW, MFC-L2750DW(XL), MFC-L2759DW and others.
Source: Colored spots at 94 mm (3.7 in.) intervals or at 29 mm (1.1 in.) intervals, checked Oct 12, 2026. Measure yours with the repeat-defect ruler.
Cleaning a Brother print head or drum
Inkjets offer Normal, Strong and Strongest cleaning, and some models add a Special cleaning that uses the most ink. Lasers have corona wire cleaning and drum cleaning. Brother’s guides cover both, and the steps for your model are in the list above.
What Brother’s manuals say about cleaning limits
- Current Brother inkjet guides (MFC-J1010DW/J1170DW): if quality has not improved, repeat cleaning; if it still does not improve after repeating several times, contact Brother Customer Service. Cleaning consumes ink and cleaning too often wastes ink. No exact number is given.Source on support.brother.com, checked Oct 12, 2026
- MFC-J4335DW/J4535DW and MFC-J5855DW/J5955DW: if several cleanings do not help, use the Special cleaning method, which uses the most cleaning power and the most ink; use it only after several normal cleanings failed. No exact number is given.Source on support.brother.com, checked Oct 12, 2026
- MFC-J995DW/J805DW/J815DW (INKvestment Tank): if cleaning does not improve print, install a new genuine cartridge for each problem colour, clean again, and contact Brother Customer Service if still not improved.Source on support.brother.com, checked Oct 12, 2026
- MFC-T4500DW (ink tank) FAQ: if you clean the print head at least five (5) times and print has not improved, clean up to three (3) more times; if still not improved, contact Brother Customer Service.Source on support.brother.com, checked Oct 12, 2026
- Brother USA article (older inkjet FAX/MFC models such as FAX1860C/FAX1960C): if at least five (5) cleanings do not help, install a new genuine cartridge for each problem colour; if after five cleanings quality has not improved, the machine requires service. Only clean when print quality has noticeably declined.Source on help.brother-usa.com, checked Oct 12, 2026
Brother alignment and color registration
Brother inkjets align the print head from the same Improve Print Quality menu, after a print quality check. Color lasers call it color registration or calibration. Confirm the result with our alignment test page.
Sources and what we could not verify
Every procedure above links to the Brother manual or support page it came from. We publish only steps we could read in an official source. See how we verify.
General Brother sources (11)
- Online User's Guide HL-L2325DW/HL-L2350DW/HL-L2370DW/HL-L2370DWXL/HL-L2379DW (support.brother.com, checked Oct 12, 2026)
- Online User's Guide HL-L2400D/HL-L2405W/HL-L2420DW/HL-L2460DW/HL-L2460DWXL/HL-L2865DW (support.brother.com, checked Oct 12, 2026)
- Online User's Guide HL-L2390DW/DCP-L2550DW/HL-L2395DW/MFC-L2690DW/MFC-L2710DW/MFC-L2717DW/MFC-L2730DW/MFC-L2750DW/MFC-L2759DW (support.brother.com, checked Oct 12, 2026)
- Online User's Guide HL-L3210CW/HL-L3230CDN/HL-L3230CDW/HL-L3270CDW (support.brother.com, checked Oct 12, 2026)
- Online User's Guide HL-L3290CDW/DCP-L3551CDW/MFC-L3710CW/MFC-L3750CDW/MFC-L3770CDW (support.brother.com, checked Oct 12, 2026)
- Online User's Guide MFC-J1010DW/MFC-J1012DW/MFC-J1170DW (support.brother.com, checked Oct 12, 2026)
- Online User's Guide MFC-J4335DW/MFC-J4345DW/MFC-J4535DW (support.brother.com, checked Oct 12, 2026)
- Online User's Guide MFC-J5340DW/MFC-J5855DW/MFC-J5955DW (support.brother.com, checked Oct 12, 2026)
- Online User's Guide MFC-J805DW/MFC-J815DW/MFC-J995DW (support.brother.com, checked Oct 12, 2026)
- MFC-J995DW INKvestment Tank Color Inkjet All-in-One Printer (brother-usa.com, checked Oct 12, 2026)
- Brother FAQ: white spots or black spots at 94 mm intervals (MFC-L2750DW) (support.brother.com, checked Oct 12, 2026)
Not yet verified (7)
- Go-button test print (as opposed to Printer Settings page) for no-screen HL-L2400D - not found in the guide
- Printer Settings report step page for HL-L3200 series (only appears in Settings Tables; testPage omitted, Test Print recorded as qualityReport)
- Repeat-defect distances for fuser or developer/other rollers on these families - Brother pages only say the fuser 'may be contaminated' and to contact Brother
- Mono-laser toner-cartridge repeat interval for HL-L2300/MFC-L2700 families (the 39 mm / 1.5 in. toner figure found applies only to older MFC8500-era and HL-L5000/6200 articles, so it was not recorded)
- Exact number of cleanings before stopping for MFC-J1010DW/J4335DW/J5855DW/J995DW (guides only say 'several')
- Normal/Strong/Strongest cleaning levels for MFC-J5855DW/J5955DW (US guide shows a single cleaning flow)
- Older HL-L2300D/HL-L2320D no-LCD Go-button combos (not covered by the 2018 HL-L2350DW guide)
Questions people ask
How do I print a test page on a Brother printer?
Brother lasers and inkjets print a Printer Settings or User Settings report from the Print Reports menu. Some models without a screen use a button sequence instead; on the HL-L2400D, Brother’s guide says pressing Go three times prints the Printer Settings page.
What is the Brother print quality check?
On Brother inkjets, the Check Print Quality (or Improve Print Quality) sheet does the job of a nozzle check. The printer prints four color blocks, and you choose the pattern that matches your printout. It then offers to clean only the colors that need it.
Why does my Brother laser print spots every 94 mm?
Brother’s support pages tie spots or marks repeating every 94 mm (3.7 in) to the drum unit, often caused by something stuck to it. They recommend cleaning the drum, and replacing it if the marks remain. On some color models, 29 mm repeats point to the toner cartridge.
How many times should I clean a Brother print head?
Current Brother inkjet guides say to repeat cleaning if quality has not improved and to contact Brother if several cleanings do not help, without a fixed number. One Brother ink tank FAQ (MFC-T4500DW) says five cleanings, then up to three more.